
SwiftUI offers several mechanisms to pass data between views.
If it seems complicated to decide which data flow mechanism fits your particular situation, that’s because such decisions cannot be made in isolation.
However, when you keep an app’s architecture in mind, it becomes easier to make the correct choice.

FREE GUIDE - SwiftUI App Architecture: Design Patterns and Best Practices
MVC, MVVM, and MV in SwiftUI, plus practical lessons on code encapsulation and data flow.
DOWNLOAD THE FREE GUIDETable of contents
Chapter 1
App Architecture and Sources of Truth
Data flow in SwiftUI revolves around the idea of a single source of truth for every piece of information.
You pick a specific data flow mechanism depending on where a source of truth resides. However, that can only be determined by your app’s architecture.
In this chapter:
Data updates drive SwiftUI view tree refreshes
SwiftUI views are regular Swift structures that can store data inside stored properties.
Such properties store the data a view receives through its initializer from a parent view, which is then used in the body of the view to build its visual representation.
struct Person: View {
	let name: String
	let surname: String
	let birthdate: Date

	var body: some View {
		VStack {
			Text("\(name) \(surname)")
			Text(birthdate, style: .date)
		}
	}
}

#Preview {
	Person(name: "John", surname: "Appleseed", birthdate: Date())
}
However, SwiftUI views do not behave like regular structures. They only represent what should appear on the screen, which the framework uses to render your app’s user interface.
This was illustrated in Apple’s introductory SwiftUI talk from WWDC 2019.

Every piece of information your app uses must be stored inside a single source of truth because multiple copies can go out of sync, leading to inconsistencies, bugs, data corruption, or data loss.
Whenever a source of truth is updated, SwiftUI rebuilds the entire view hierarchy with the new value and updates the user interface on the screen.

Note
The word “single” makes some developers think there should be a central place where all the app’s data is stored.
However, the idea of a single source of truth applies to each unique piece of data. Thus, your app should have multiple sources of truth.
I consider architectural patterns that force you to put all data in a single “store” to be anti-patterns that violate several software design principles, such as the SOLID principles.
Redux and The Composable Architecture are two examples of such anti-patterns.
The primary property wrappers for generic SwiftUI data flow
Since a SwiftUI view hierarchy is refreshed every time a source of truth is updated, regular stored properties do not satisfy a complex app’s data flow needs.
That’s why SwiftUI offers several property wrappers that can be attached to the stored properties of a view to change their behavior.
The framework offers many property wrappers, which can be confusing when taken in isolation. Luckily, the list of the primary mechanisms used for generic data flow in every SwiftUI app is short.
- The
@Stateproperty wrapper allows a view to establish a source of truth that persists across view hierarchy refreshes. - The
@Bindingand@Bindableproperty wrappers allow a view to change data that resides somewhere else up the view hierarchy. The former works with value types, e.g., structures and enumerations, while the latter works with objects. - The
@Environmentproperty wrapper allows a view to access values and objects available to an entire view hierarchy, no matter how far from their source of truth.
Objects stored in properties with the @State, @Bindable, and @Environment wrappers must be marked with the @Observable macro.
Note
The @Observable macro was introduced by the Observation framework.
Projects created before Observable or targeting unsupported OS versions might still use the @StateObject, @ObservedObject, and @EnvironmentObject property wrappers for objects that conform to the ObservableObject protocol.
Your app’s structure determines its data flow mechanisms
Talking about data flow in SwiftUI without talking about architecture is impossible.
The second most popular data flow diagram for SwiftUI I have seen, after Apple’s, is the one devised by Chris Eidhof, which I have revised below for the Observation framework.

While this diagram addressed the questions I listed above, it is still too generic and, in my opinion, only helpful once you are experienced in structuring SwiftUI apps. However, if you are, then you don’t need the diagram.
Looking at the available property wrappers, it’s evident that we must determine where information should be stored in a view hierarchy before deciding which data flow mechanism to use.
That, in turn, depends on:
- The structure of our app;
- How many views must access a piece of information;
- How far away a source of truth it is from such views;
- How data is stored and manipulated (value vs. reference);
- How data is persisted and retrieved (disk, network, device sensors).
Ultimately, these questions can be answered only in the context of an architectural design pattern that tells you where information should be stored and why.
In light of this, I made a new flow chart to decide which data flow mechanism to pick.

We will explore these ideas more in-depth throughout this article, so you will probably have to revisit the diagram after reading it.
Chapter 2
Passing values to a view
Value types, and especially structures, are the most common abstractions you use in Swift. Since the release of the Swift language, Apple has emphasized value types over references.
The SwiftUI framework also uses value types for its views. So, that’s where we will start exploring SwiftUI’s data flow.
In this chapter:
FREE GUIDE - SwiftUI App Architecture: Design Patterns and Best Practices
MVC, MVVM, and MV in SwiftUI, plus practical lessons on code encapsulation and data flow.
DOWNLOAD THE FREE GUIDEAn app’s data model influences its data flow
While some developers like to debate that architecture “depends” on a case-by-case basis, the reality is that any design pattern is a variation of the MVC pattern, including MVVM.
Moreover, the SwiftUI diagram Apple showed when introducing SwiftUI in 2019 is the same as the one presented in this document by the creator of MVC 40 years earlier.
That means SwiftUI is designed around the MVC pattern, regardless of the rants you can read on Apple’s forums.
I use the following version of MVC/MVVC for all my apps and courses. If you want to learn more about it, you can read the two articles I linked above and download my guide on SwiftUI architecture.

As an example, we will build a small app displaying a single contact, which the user can edit. You can find the complete Xcode project on GitHub.

For starters, we need to establish the data model for our app, which, in our example, is a simple structure representing a contact.
Contact.swift
struct Contact {
	var name: String
	var position: String
	var email: String
	var phone: String
	var photo: Image
}
When establishing the data model for your app, you also need to decide how to persist data. We’ll save our contact information in a JSON file. We will place the contact photo inside the project’s asset catalog to simplify our example.
Contact.swift
struct Contact: Codable {
	var name: String
	var position: String
	var email: String
	var phone: String
	var photo = Image(.madison)

	enum CodingKeys: CodingKey {
		case name
		case position
		case email
		case phone
	}
}
I got the photo from Unsplash.com if you need free project images.
Note
Deciding when to use structures or classes is part of determining the correct data flow mechanism for a SwiftUI app.
Apple traditionally recommends using values over references, which is also a convention I usually follow.
Both approaches have their advantages and disadvantages. If you’re using a complex data storage solution like Core Data or SwiftData, that decision is taken for you since your model types must be classes.
Use regular stored properties and initializers for read-only values
The easiest and most common way to pass data to a SwiftUI view is through regular stored properties and initializers.
You use stored properties in views that need read-only values coming from a source of truth up the view tree.
This is already evident in the SwiftUI framework’s many views, such as Text and Image, which have multiple initializers taking different parameters.
This is often the case for small modular views in the view layer in your apps. For example, we can create a view for the top section of our Contact Details screen.
ContentView.swift
private struct Header: View {
	let photo: Image
	let name: String
	let position: String

	var body: some View {
		VStack {
			photo
				.resizable()
				.scaledToFill()
				.frame(width: 200, height: 200)
				.clipShape(Circle())
				.overlay(
					Circle().stroke(Color.white, lineWidth: 2.0))
			Text(name)
				.font(.title)
				.bold()
			Text(position)
				.font(.body)
				.foregroundStyle(.secondary)
		}
		.padding(.bottom, 24)
		.frame(maxWidth: .infinity)
		.alignmentGuide(.listRowSeparatorLeading) { $0[.leading] }
	}
}
We often need static data to use inside Xcode previews. We can create a Contact value, which we will also use later as the default data for our app.
Contact.swift
extension Contact {
	static var `default`: Self {
		Contact(
			name: "Madison Thompson",
			position: "Sales, Gale Foods",
			email: "[email protected]",
			phone: "4-(968)705-1370"
		)
	}
}
Note
Since default is a reserved keyword of the Swift language, we need backticks to use it as a property name.
Since SwiftUI views are Swift structures, the compiler automatically synthesizes a memberwise initializer we can use in our previews.
ContentView.swift
#Preview("Header") {
	List {
		let contact = Contact.default
		Header(
			photo: contact.photo,
			name: contact.name,
			position: contact.position
		)
	}
	.listStyle(.plain)
}
Keep views decoupled from your data types
Notice that we didn’t use the Contact type in the Header view. Instead, we used properties with simple types, i.e., String and Image.
This adds more code every time we initialize any of these views. Passing a single Contact parameter to our view would be more straightforward than breaking it apart. But that would couple the Header view to the Contact type, making it less reusable.
Following the same principle, we can create a view that displays a single contact detail.
ContentView.swift
private struct Detail: View {
	let label: String
	let text: String
	let destination: URL

	var body: some View {
		VStack(alignment: .leading) {
			Text(label)
				.font(.footnote)
				.bold()
			Link(text, destination: destination)
				.buttonStyle(BorderlessButtonStyle())
		}
		.padding(.top, 8.0)
	}
}

#Preview("Detail") {
	List {
		Detail(
			label: "Email",
			text: Contact.default.email,
			destination: URL(string: "example.com")!
		)
	}
	.listStyle(.plain)
}
We can assemble the view for the Contact Details screen using the Header and Detail views.
ContentView.swift
struct ContentView: View {
	let contact: Contact = .default

	var body: some View {
		List {
			Header(photo: contact.photo, name: contact.name, position: contact.position)
				.frame(maxWidth: .infinity)
			Detail(
				label: "Email",
				text: contact.email,
				destination: URL(string: "mailto:\(contact.email)")!
			)
			Detail(
				label: "Phone",
				text: contact.phone,
				destination: URL(string: "tel://\(contact.phone)")!
			)
		}
		.listStyle(.plain)
		.navigationTitle("Contact Details")
	}
}

#Preview {
	NavigationStack {
		ContentView()
			.environment(StateController())
	}
}
The ContentrView is a root view in the abovementioned MVC diagram. As such, it usually has a more complex data flow than other SwiftUI views.
For now, I used a simple constant property to store the .default contact. Later, this information will come from a different source of truth.
In its body, the ContentView passes the pertinent data to the Header and Detail views.
Chapter 3
Creating and updating state
SwiftUI views receive, through their stored properties, data that resides in a single source of truth.
That means that views need a way to create such a source of truth or update one that resides up the view tree.
In this chapter:
FREE GUIDE - SwiftUI App Architecture: Design Patterns and Best Practices
MVC, MVVM, and MV in SwiftUI, plus practical lessons on code encapsulation and data flow.
DOWNLOAD THE FREE GUIDEStore interface state in a local source of truth
The first of the data flow SwiftUI property wrappers is @State, which allows views to establish a local source of truth.
While the data in regular stored properties is updated whenever the view hierarchy is refreshed, a @State property keeps its value across refreshes.
The simplest type of source of truth is a local mutable value to control the state of the user interface.
Interactive controls often change how information is presented on the screen without altering the underlying data.
A typical example is modal presentation controlled by a local source of truth. We can add an Edit button to our app’s main screen, which presents an edit screen when tapped.
ContentView.swift
struct ContentView: View {
	let contact: Contact = .default
	@State private var isEditing = false

	var body: some View {
		List {
			// ...
		}
		.listStyle(.plain)
		.navigationTitle("Contact Details")
		.toolbar {
			Button("Edit", action: { isEditing = true })
		}
		.fullScreenCover(isPresented: isEditing) {
			EditContactView()
		}
	}
}
EditContactView.swift
struct EditContactView: View {
	var body: some View {
		// ...
	}
}
According to the MVC pattern, navigation code and its relative state go into root views, so the isEditing state property belongs to the ContentView. However, modular views can also store state to control their interface.
Note
While modal presentation is often tied to a boolean state, it can also be connected directly to the app’s data.
SwiftUI’s presentation modifiers have alternative declarations that can connect to optional values of any type instead of boolean properties.
Use bindings to update a source of truth up a view hierarchy
Views often need to change state they do not own. Such data usually resides in a source of truth somewhere up the view hierarchy. For that, we use bindings.
The SwiftUI framework offers many views that use bindings to update a source of truth you provide. Some common examples are the TextField, Toggle, or Picker views.
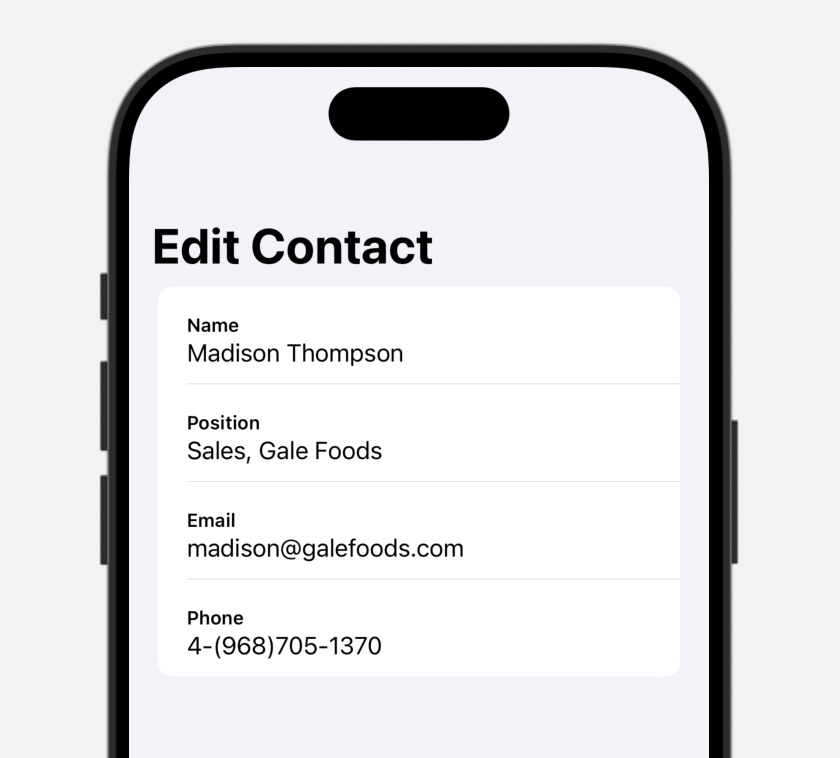
In our app, the fields for editing the contact information all look the same, so we can create a single reusable view.
EditContactView.swift
struct EditableDetail: View {
let title: String
@Binding var text: String
var body: some View {
VStack(alignment: .leading, spacing: 0) {
Text(title)
.font(.footnote)
.bold()
TextField("", text: $text)
}
.padding(.top, 8.0)
}
}
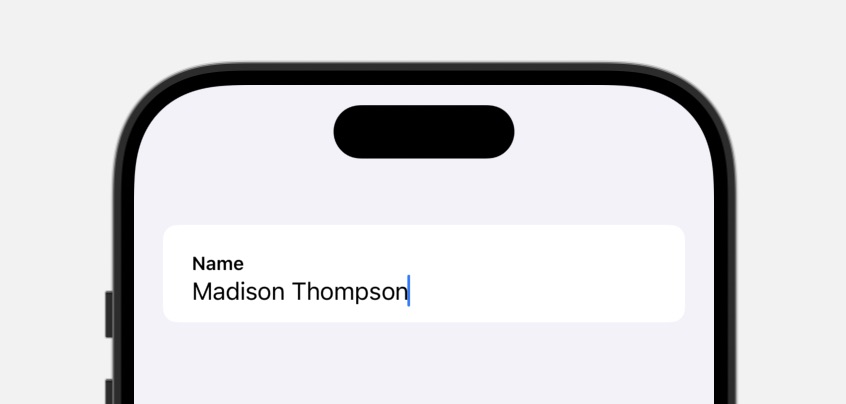
#Preview("Editable Row") {
@Previewable @State var name: String = Contact.default.name
List {
EditableDetail(title: "Name", text: $name)
}
}
Our EditableDetail view does not own the data in its text property. So, we use a @Binding to connect to a single source of truth up the view hierarchy.
The contained TextField view also uses a binding for the same reason. While it might look like we can pass the text property directly to the TextField initializer since it is a binding, that does not work.
That’s because of how property wrappers work in Swift. When we use the text property plainly, we refer to its contained value as it usually happens, regardless of the property wrapper we attach to it.
That’s why we must prepend the $ operator to the text property to create a binding to pass to the TextField view.
Note
The @Binding property wrapper only works with value types, i.e., structures and enumerations, and their stored properties.
If you need to bind to the stored properties of an object, use the @Bindable wrapper instead for the stored property containing the object.
Before the Observation framework, you would use the @ObservedObject wrapper with objects that conform to the ObservableObject protocol.
As this code shows, bindings can be connected to other bindings, but eventually, they must reach a source of truth defined by a @State property.
That already happens in the preview code for the EditableDetail view. Inside previews, @State variables must be preceded by the @Previewable macro since they are not inside a view.
Note
Technically, the $ operator in Swift does not create a binding. Instead, it accesses the projected value of a property wrapper.
However, since the projected value of any SwiftUI property wrapper is always a binding, the $ operator always creates a binding in SwiftUI.
Store additional data-related logic inside a view model object
Any chain of bindings must eventually reach a source of truth, usually, but not always, inside a root view.
In our example, the edited data must be kept in a draft to allow the user to discard changes. That means we must place it inside a @State stored property.
We could use a simple value type, i.e., the Contact structure. However, root views often need a view model object that embeds additional logic.
For example, we can create a view model for our EditContactView that checks whether a draft can be saved to ensure the contact does not have an empty name.
EditContactView.swift
@Observable
private class ViewModel {
	var draft: Contact

	var canSave: Bool {
		!draft.name.isEmpty
	}

	init(draft: Contact) {
		self.draft = draft
	}
}
Classes must be preceded by the @Observable macro to allow their instances to be placed inside @State properties because classes have a built-in notion of identity.
EditContactView.swift
struct EditContactView: View {
	@State private var viewModel = ViewModel(draft: .default)

	var body: some View {
		NavigationStack {
			List {
				EditableDetail(title: "Name", text: $viewModel.draft.name)
				EditableDetail(title: "Position", text: $viewModel.draft.position)
				EditableDetail(title: "Email", text: $viewModel.draft.email)
				EditableDetail(title: "Phone", text: $viewModel.draft.phone)
			}
			.navigationTitle("Edit Contact")
		}
	}
}

#Preview {
	EditContactView()
}
The @Observable macro allows SwiftUI to track a class’s stored properties and trigger a view refresh every time their content changes, as it happens for value types.
If you want to change some stored properties without triggering a user interface update, use the @ObservationIgnored macro to opt out the selected properties.
Note
Before the Observation framework, you would use @StateObject instead of @State and add the ObservableObject protocol conformance to a class instead of the @Observable macro.
Moreover, the stored properties of a class would not be automatically tracked but would need to be opted in individually using the @Published property wrapper.
Chapter 4
Traversing the View Tree
The @State property wrapper establishes a source of truth, while @Binding and @Bindable access a source of truth up the view hierarchy.
Theoretically, these wrappers already cover all our data flow needs. However, long binding chains in large apps can be inconvenient and create unnecessary coupling, so we need more convenient ways of transferring data through the view tree.
In this chapter:
FREE GUIDE - SwiftUI App Architecture: Design Patterns and Best Practices
MVC, MVVM, and MV in SwiftUI, plus practical lessons on code encapsulation and data flow.
DOWNLOAD THE FREE GUIDEPass information to an entire view hierarchy through the environment
SwiftUI views often access only a limited part of the entire app data. However, at times, some information needs to reach several, if not all, views.
Passing such information through the initializer of every view would introduce too much coupling. Too many parameters can also make code unreadable.
The SwiftUI environment solves this problem, allowing every view in a hierarchy to access a piece of information.
A good example is Dark Mode, which requires every single element in your UI to adapt. Even the iOS system colors are sensitive to dark mode.
The standard views in the SwiftUI framework support Dark Mode out of the box, which means that this information is stored in the environment and available to every view.
In our example, we will override the device settings and display our user interface always in dark mode, mimicking apps like Clock, Calculator, and Stocks.
You can set any environment value using the environment(_:_:) view modifier.
ContactApp.swift
@main
struct ContactApp: App {
	var body: some Scene {
		WindowGroup {
			NavigationStack {
				ContentView()
			}
			.environment(\.colorScheme, .dark)
		}
	}
}
You can find all the available environment values in the documentation for the EnvironmentValues type.
Xcode previews do not reflect environment values set at the app level since the app structure is not involved. To see the app in dark mode, you must run it in the simulator.
Reading SwiftUI environment values in custom views
You can read environment values using the @Environment property wrapper.
Apple recommends avoiding reading the colorScheme value and instead using the standard SwiftUI views in the framework.
However, there is one caveat. At the time of writing, modal presentation does not carry forward environment values. You have to set them again every time you present a modal view.
ContentView.swift
struct ContentView: View {
	let contact: Contact = .default
	@State private var isEditing = false
	@Environment(\.colorScheme) var colorScheme

	var body: some View {
		List {
			// ...
		}
		.listStyle(.plain)
		.navigationTitle("Contact Details")
		.toolbar {
			Button("Edit", action: { isEditing = true })
		}
		.fullScreenCover(isPresented: $isEditing) {
			EditContactView()
				.environment(\.colorScheme, colorScheme)
		}
	}
}
Dismissing modal presentation is another typical example of how accessing the environment is helpful.
The presentation state of a view hierarchy is stored in the environment, and you can dismiss it using the .dismiss environment value.
EditContactView.swift
struct EditContactView: View {
	@State private var viewModel = ViewModel(draft: .default)
	@Environment(\.dismiss) private var dismiss

	var body: some View {
		NavigationStack {
			List {
				// ...
			}
			.navigationTitle("Edit Contact")
			.toolbar {
				ToolbarItem(placement: .navigationBarLeading) {
					Button("Cancel") { dismiss() }
				}
				ToolbarItem(placement: .navigationBarTrailing) {
					Button("Save") { dismiss() }
				}
			}
		}
	}
}
You are not limited to the environment values in the EnvironmentValues type. You can set new environment values using the @Entry macro. You can see an example on its documentation page.
Note
You can call the dismiss stored property as if it were a function because it’s a callable value.
Store the app’s data in a centralized controller shared through the environment
Apps often need a centralized source of truth that is accessible to all root views. That is usually implemented as a controller object shared through the environment.
Currently, our example app has two different sources of truth for the contact information, one in the ContentView and one in the EditContactView.
We can merge the two sources of truth into a state controller, which can also save its data to disk.
StateController.swift
@Observable
class StateController {
	private let contactURL = URL
		.documentsDirectory
		.appendingPathComponent("contacts")
		.appendingPathExtension("json")

	var contact: Contact {
		didSet {
			guard let data = try? JSONEncoder().encode(contact) else { return }
			try? data.write(to: contactURL)
		}
	}

	init() {
		guard let data = try? Data(contentsOf: contactURL),
			  let contact = try? JSONDecoder().decode(Contact.self, from: data)
		else {
			self.contact = .default
			return
		}
		self.contact = contact
	}
}
Controllers are usually instantiated in the app structure and shared through the environment(_:) view modifier.
ContactApp.swift
@main
struct ContactApp: App {
	@State private var stateController = StateController()

	var body: some Scene {
		WindowGroup {
			NavigationStack {
				ContentView()
			}
			.environment(\.colorScheme, .dark)
			.environment(stateController)
		}
	}
}
You then use the @Environment property wrapper to access any object you store in the environment.
We can replace the hardcoded default contact in the ContentView.
ContentView.swift
struct ContentView: View {
	@State private var isEditing = false
	@Environment(\.colorScheme) var colorScheme
	@Environment(StateController.self) private var stateController

	var contact: Contact { stateController.contact }

	var body: some View {
		List {
			// ...
		}
		.listStyle(.plain)
		.navigationTitle("Contact Details")
		.toolbar {
			Button("Edit", action: { isEditing = true })
		}
		.fullScreenCover(isPresented: $isEditing) {
			// ...
		}
	}
}

#Preview {
	NavigationStack {
		ContentView()
			.environment(StateController())
	}
}
Then, we do the same in the EditContactView to connect it to the same centralized source of truth.
EditContactView.swift
struct EditContactView: View {
	@State private var viewModel: ViewModel?
	@Environment(\.dismiss) private var dismiss
	@Environment(StateController.self) private var stateController

	var body: some View {
		NavigationStack {
			if let viewModel {
				List {
					@Bindable var viewModel = viewModel
					EditableDetail(title: "Name", text: $viewModel.draft.name)
					EditableDetail(title: "Position", text: $viewModel.draft.position)
					EditableDetail(title: "Email", text: $viewModel.draft.email)
					EditableDetail(title: "Phone", text: $viewModel.draft.phone)
				}
				.navigationTitle("Edit Contact")
				.toolbar {
					ToolbarItem(placement: .navigationBarLeading) {
						Button("Cancel") { dismiss() }
					}
					ToolbarItem(placement: .navigationBarTrailing) {
						Button("Save") {
							stateController.contact = viewModel.draft
							dismiss()
						}
						.disabled(viewModel.canSave)
					}
				}
			}
		}
		.task {
			self.viewModel = ViewModel(draft: stateController.contact)
		}
	}
}

#Preview {
	EditContactView()
		.environment(StateController())
}
A critical aspect of the environment is that it is unavailable when a view is initialized.
Since the ViewModel class initializer needs a Contact value, we have to wait for the environment to be available and initialize it inside the task(priority:_:) modifier as recommended by Apple’s documentation.
Moreover, we need to declare a @Bindable variable after using optional binding on the viewModel property to use the $ operator to create bindings for the EditableDetail views.
Note
Before the Observation framework, you would add objects to the environment using the environmentObject(_:) view modifier and access them using the @EnvironmentObject property wrapper.
Propagating values up a view hierarchy using SwiftUI’s view preferences
SwiftUI also has a mechanism to propagate values upward in a view hierarchy called preferences. You can think of preferences as the inverse of the environment, although it’s not an analogy that matches perfectly.
Preferences are pretty complex to use and need several moving parts. It’s much easier to pass a value from a single origin down a tree than to combine values from views at different levels in a hierarchy.
Preferences are rarely necessary for standard iOS apps, so they are outside this article’s scope.
But you can still see them in action in your apps. For example, you set the title of a navigation bar using the .navigationTitle view modifier.
ContentView.swift
struct ContentView: View {
	@State private var isEditing = false
	@Environment(\.colorScheme) var colorScheme
	@Environment(StateController.self) private var stateController

	var contact: Contact { stateController.contact }

	var body: some View {
		List {
			// ...
		}
		.listStyle(.plain)
		.navigationTitle("Contact Details")
		.toolbar {
			// ...
		}
		.fullScreenCover(isPresented: $isEditing) {
			// ...
		}
	}
}
Notice that we are applying this modifier to the List views inside the body of the ContentView, and yet the NavigationStack containing the ContentView in the ContactApp structure can read that title.
The NavigationStack type and the .navigationTitle modifier use SwiftUI’s preferences. The toolbar(content:) modifier also uses preferences to add buttons to the navigation bar of a NavigationStack.
SwiftUI App Architecture: Design Patterns and Best Practices
It's easy to make an app by throwing some code together. But without best practices and robust architecture, you soon end up with unmanageable spaghetti code. In this guide I'll show you how to properly structure SwiftUI apps.
Matteo has been developing apps for iOS since 2008. He has been teaching iOS development best practices to hundreds of students since 2015 and he is the developer of Vulcan, a macOS app to generate SwiftUI code. Before that he was a freelance iOS developer for small and big clients, including TomTom, Squla, Siilo, and Layar. Matteo got a master’s degree in computer science and computational logic at the University of Turin. In his spare time he dances and teaches tango.


Hi Matteo,
Thanks as always for the really helpful guide! One question for you:
How would you handle a situation where multiple @StateObjects rely upon a shared object?
For example, in my app, I have a
StateManagerand aContentManager(for pulling audio content, etc.), both of which rely upon aStorageManager; however, the below code results in the following error, because I’m not able to instantiate that shared object beforehand:Equally, I can’t create the objects within the
bodyblock, because that gets called many times over during the app lifecycle.The only workaround I’ve thought of so far is to use a static singleton version of the
StorageManager, but I know you often advise against that as a design decision.Any suggestions would be welcome.
Thanks!
In that case, you need to explicitly initialize the stored properties in the initializer of your app structure:
Perfect; thanks!
I hadn’t considered the possibility of an explicit initializer in this context. I appreciate the insight.