You can make a REST API call in Swift in just three lines of code thanks to URLSession and async/await.
However, implementing a networking layer in a full-fledged app presents several architectural pitfalls.
In this article we will see how REST works, how to perform API calls in a SwiftUI app, and the best way to architect the networking layer of an iOS app.

FREE GUIDE - SwiftUI App Architecture: Design Patterns and Best Practices
MVC, MVVM, and MV in SwiftUI, plus practical lessons on code encapsulation and data flow.
DOWNLOAD THE FREE GUIDETable of contents
Chapter 1
How to make a REST API Call in Swift
Making a single REST API call in Swift is as straightforward as fetching data from a URL using URLSession. The steps can be distilled into:
- Identify the URL of the desired API endpoint.
- Retrieve JSON data from the API using the
URLSessionclass with async/await. - Decode the data into a Swift type using
CodableandJSONDecoder.
These steps can be accomplished with just a few lines of code. However, as we will see later in this article, fetching data from a REST API within a SwiftUI app involves more complexity than meets the eye.
In this chapter:
Decoding the JSON Data from a REST API
As an example, we will retrieve the title and score for the most upvoted Stack Overflow question of all time using this URL from the StackExchange API.
Here is the JSON data returned by the /questions API endpoint, configured to produce only the data we are interested in.
{
	"items": [
		{
			"score": 27089,
			"title": "Why is processing a sorted array faster than processing an unsorted array?"
		}
	]
}
As a starting point, we need to define two Swift structures for decoding the JSON data using the Codable protocol.
struct Wrapper: Codable {
	let items: [Question]
}

struct Question: Codable {
	let score: Int
	let title: String
}
Since the Stack Exchange API wraps all data inside a common wrapper object, we also require a Wrapper structure. This is specific to the Stack Exchange API, as not all REST APIs wrap their returned data in this way.
Fetching data from a REST API in Swift
Now, we can create a function to make an API request using async/await.
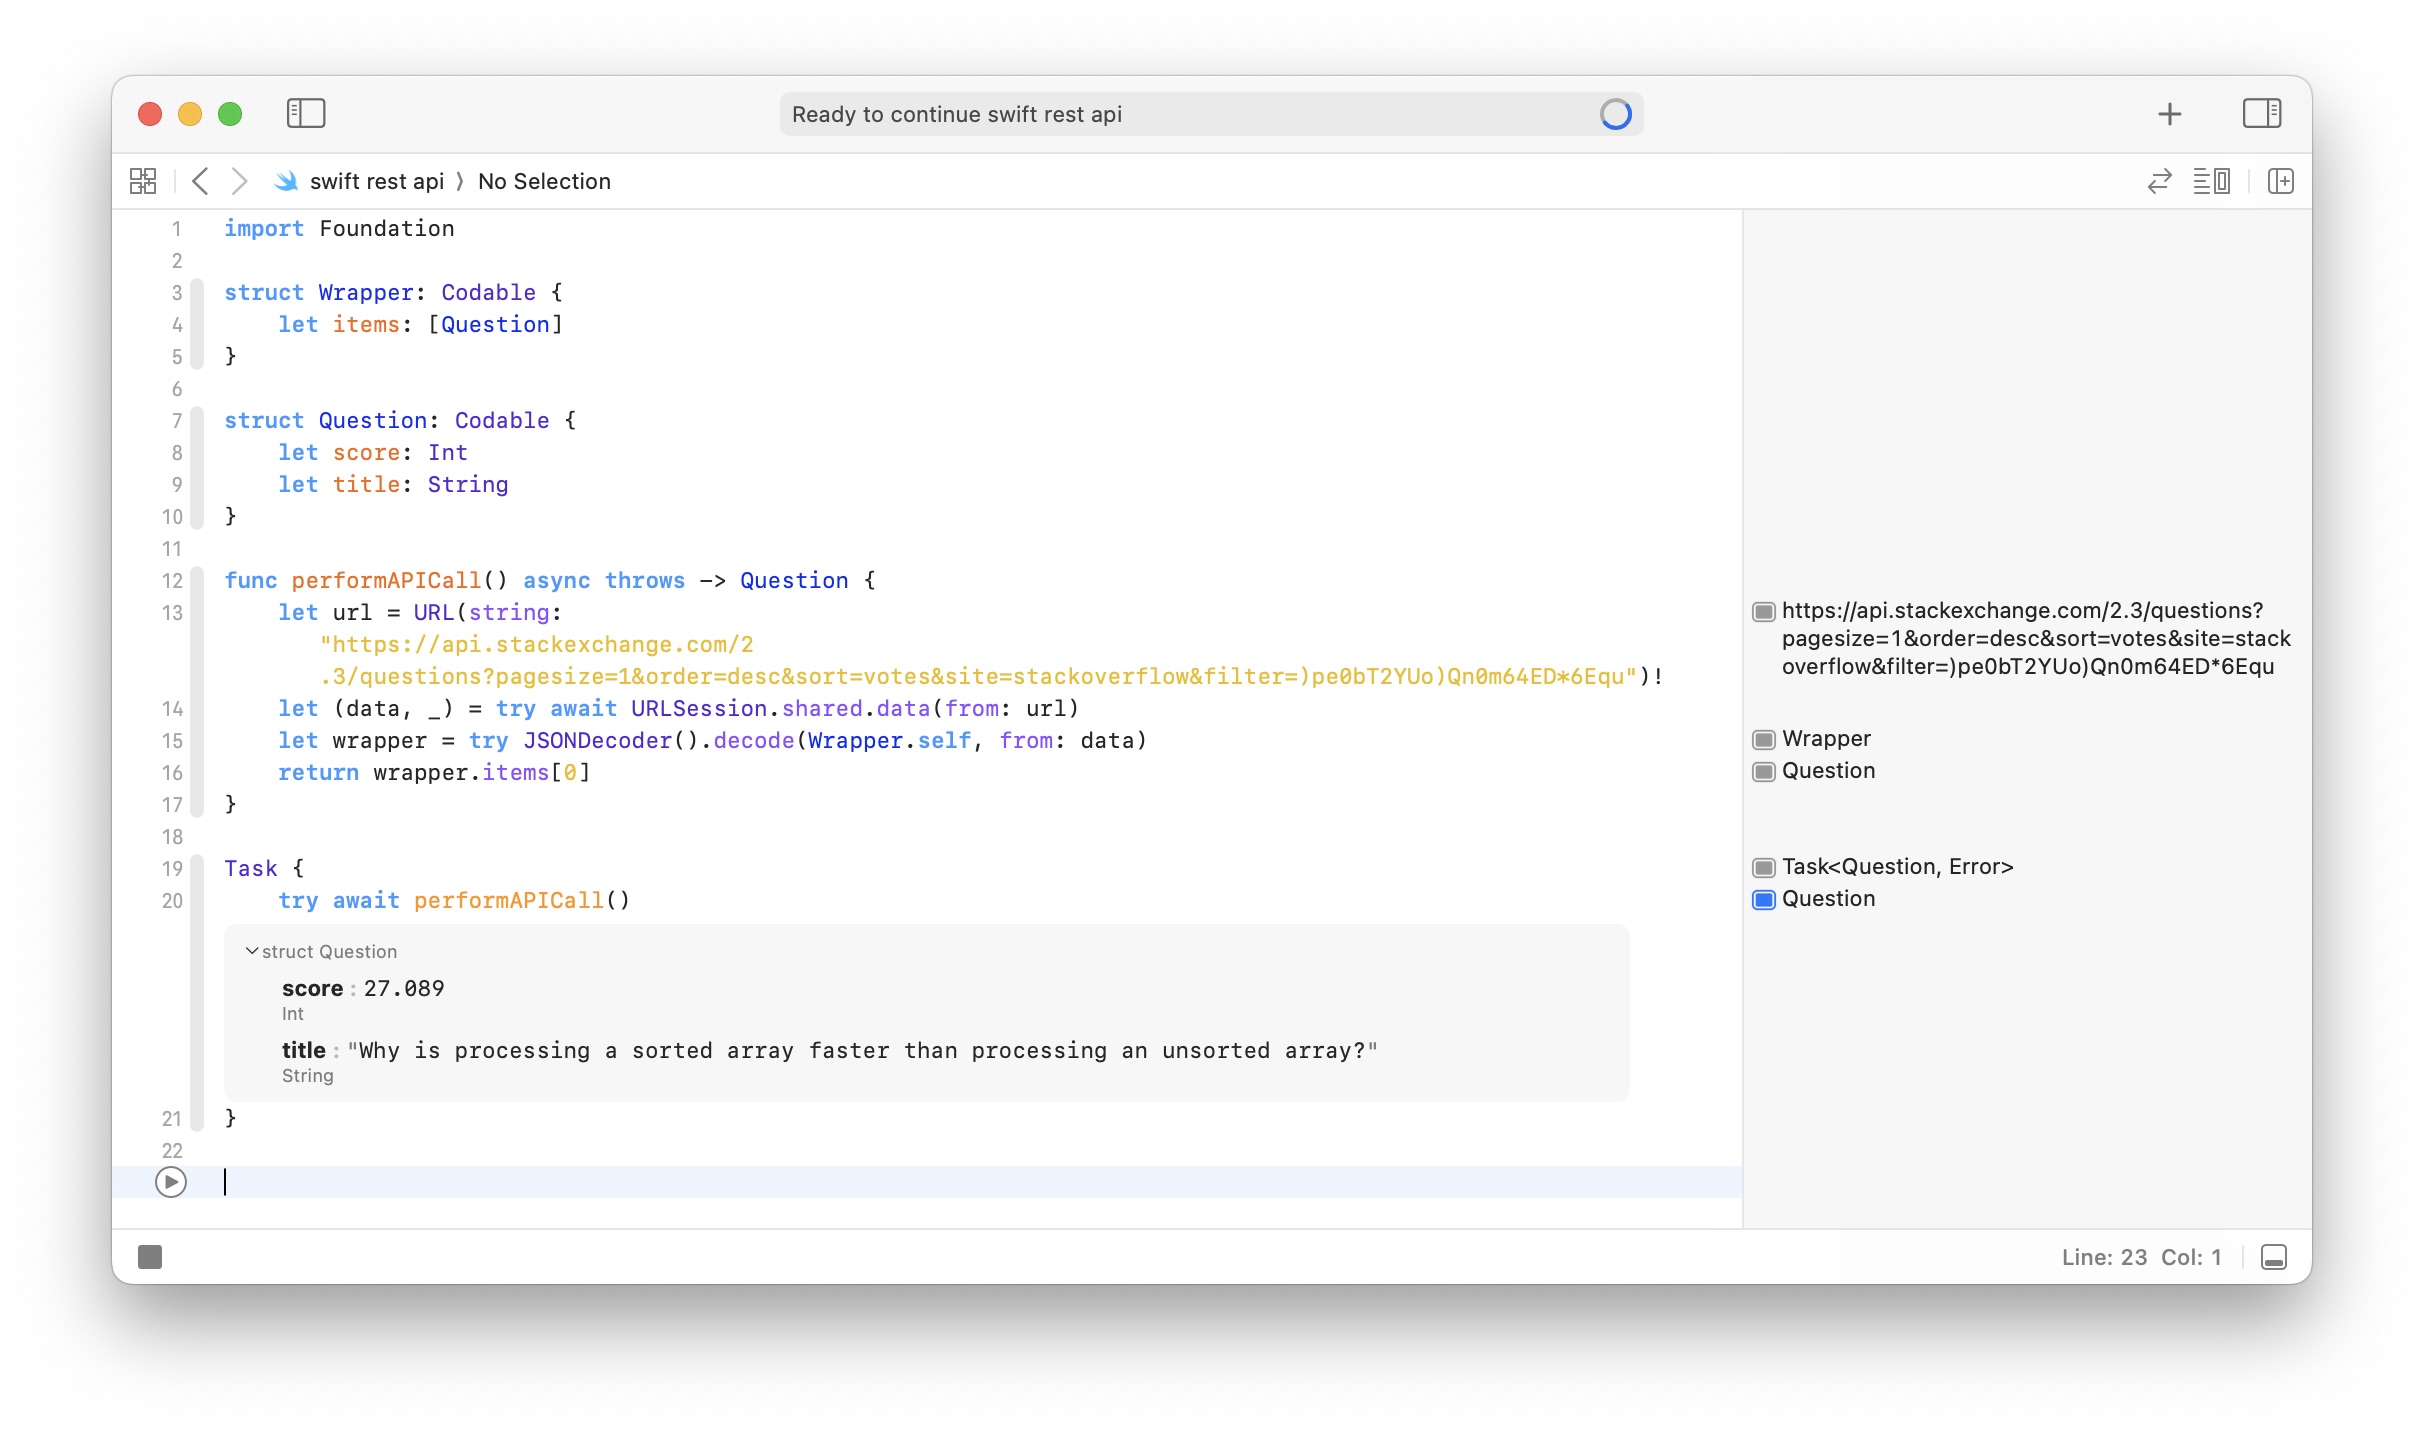
func performAPICall() async throws -> Question {
	let url = URL(string: "https://api.stackexchange.com/2.3/questions?pagesize=1&order=desc&sort=votes&site=stackoverflow&filter=)pe0bT2YUo)Qn0m64ED*6Equ")!
	let (data, _) = try await URLSession.shared.data(from: url)
	let wrapper = try JSONDecoder().decode(Wrapper.self, from: data)
	return wrapper.items[0]
}
To test that our code functions as expected, we can execute it within a Task in a Swift playground and inspect the returned data.
Task {
	try await performAPICall()
}
More commonly, in a SwiftUI app, REST API calls are executed when a view appears on the screen using the task(priority:_) view modifier.
struct ContentView: View {
	@State var question: Question?

	var body: some View {
		VStack(alignment: .leading) {
			if let question {
				Text(question.title)
					.font(.title)
				Text("Score: " + question.score.formatted())
			} else {
				Text("No data available")
			}
		}
		.padding(20.0)
		.task {
			do {
				question = try await performAPICall()
			} catch {
				question = nil
			}
		}
	}

	func performAPICall() async throws -> Question {
		// ...
	}
}

This is also where you handle potential errors, typically by displaying an error message to the user.
Chapter 2
What is a RESTful API from the point of view of an iOS app
While making a network request can be achieved with just a few lines of code, fully utilizing a REST API necessitates understanding its structure and the internet technologies it relies on.
In this chapter:
FREE GUIDE - SwiftUI App Architecture: Design Patterns and Best Practices
MVC, MVVM, and MV in SwiftUI, plus practical lessons on code encapsulation and data flow.
DOWNLOAD THE FREE GUIDEGetting a list of an API’s URL endpoints and resource paths
The first information you need when interacting with a REST API is a list of its endpoints. These uniform resource locators (URLs) provide the locations of all the API resources on a server.
REST APIs typically have a base URL endpoint, such as https://api.stackexchange.com or https://api.github.com, from which all other endpoints are derived by adding a URL path.
The content of a response can be further configured by adding query string parameters to the endpoint URL or, in some cases, by providing additional HTTP parameters, as we will discuss later.
Whether you interact with a private API owned by your company or one of the many public APIs available on the web, the API’s endpoints are usually documented. Often, you will have to assemble each endpoint URL from its components, as is the case with the Stack Exchange API. However, as the GitHub API does, some APIs return most endpoints in their responses.
REST uses HTTP requests to make API calls
REST, or Representational State Transfer, is a type of architecture for web services. As iOS developers, we are primarily concerned with how REST appears from the perspective of a client SwiftUI app. REST operates over the Hypertext Transfer Protocol (HTTP), initially designed for transmitting web pages over the internet.
In an HTTP request, you typically include:
- A URL that identifies the resource you want.
- An HTTP method indicating the action you wish to perform.
- HTTP headers that specify parameters for the request.
- Optionally, a body containing data to send to the server.
GET /index.html HTTP/1.1
Host: www.example.com
Authorization: Basic YWxhZGRpbjpvcGVuc2VzYW1l
HTTP methods and REST API actions
Most REST APIs utilize a subset of HTTP methods to express the actions you can perform:
GETto retrieve a resource.POSTto create a new resource.PUTto create a new resource or update an existing one.PATCHto update an existing resource.DELETEto remove a resource.
For instance, the MailChimp Marketing API employs all five methods. Using distinct HTTP methods allows the API to return an error for invalid actions, such as attempting to create a resource that already exists.
However, these actions are not universally adopted by all REST APIs. For example, editing a question on the Stack Exchange API requires the POST method.
Regarding parameters, you may have noticed two options: the query string in the URL or HTTP headers.
The choice between query string parameters and HTTP headers typically depends on the API, but, in general:
- The query string is used for parameters related to the resource being accessed.
- HTTP headers are used for parameters related to the request, such as authentication headers.
A REST API returns data inside an HTTP response
In HTTP, requests are sent to a server, which responds with data. An HTTP response generally includes:
- A status code, a numerical indicator of the success or failure of the request.
- HTTP headers containing additional information about the response.
- Data, if requested.
HTTP/1.1 200 OK
Date: Mon, 23 May 2005 22:38:34 GMT
Content-Type: text/html; charset=UTF-8
Content-Encoding: UTF-8
Content-Length: 138
Last-Modified: Wed, 08 Jan 2003 23:11:55 GMT
Server: Apache/1.3.3.7 (Unix) (Red-Hat/Linux)
ETag: "3f80f-1b6-3e1cb03b"
Accept-Ranges: bytes
Connection: close
While REST APIs can use various data formats, most return data in Javascript Object Notation (JSON) format. JSON is designed to be lightweight, human-readable, and machine-friendly.
However, some web services employ XML, Markdown, or HTML formats. If interacting with a Windows server, you might receive data in the SOAP format, requiring a custom parser as it’s XML-based.
Additionally, when communicating with remote APIs, you might not receive binary data like images or videos directly. Instead, you typically get URLs pointing to a content delivery network in the JSON data. This means you’ll contact a different server with its own rules.
Chapter 3
Integrating authentication and response handling
Once you grasp how REST APIs use the HTTP protocol, you can make more fine-tuned API calls. These allow you to add authentication, send data to the REST API, and adequately handle responses and errors.
In this chapter:
FREE GUIDE - SwiftUI App Architecture: Design Patterns and Best Practices
MVC, MVVM, and MV in SwiftUI, plus practical lessons on code encapsulation and data flow.
DOWNLOAD THE FREE GUIDEAuthentication methods and authorizing Swift API calls
Some REST APIs may require user authentication to perform actions. Two standard authentication methods are:
- HTTP Basic Authentication: This method uses the user’s username and password. It’s typically used when developing an app for an API owned by the same company, such as the MailChimp app.
- OAuth 2.0: This method utilizes an access token obtained after the user logs into the API website. It’s employed when developing third-party apps for APIs you don’t own. For example, if you want to make a third-party app using the MailChimp API, you must implement their OAuth 2 flow.
In some cases, companies might even use OAuth 2.0 for their own apps, as with the GitHub app.
Regardless of the method you use, authentication is usually achieved by adding an Authorization HTTP header to the request.
HTTP Basic Authentication
To authenticate an API request using HTTP basic authentication, you set the Authorization header value to Basic <CREDENTIALS>, where <CREDENTIALS> is the Base64 encoding of the username and password joined by a single colon :.
This is an example of using HTTP basic authentication to authorize a REST API call in Swift.
func performAuthenticatedAPICall() async throws -> User {
	let url = URL(string: "api.example.com/user")!
	var request = URLRequest(url: url)
	let credentials = "username:password".data(using: .utf8)!.base64EncodedString()
	request.setValue("Basic \(credentials)", forHTTPHeaderField: "Authorization")
	let (data, _) = try await URLSession.shared.data(for: request)
	return try JSONDecoder().decode(User.self, from: data)
}
OAuth 2.0 Authentication
OAuth 2.0 introduces complexity due to the authentication flow for native apps, requiring users to authenticate directly on the API’s website. However, authorizing an API call works similarly to HTTP Basic Authentication once authenticated. You set the HTTP request’s Authorization header value to Bearer <TOKEN>.
This is an example of using OAuth 2.0 to authorize a REST API call in Swift.
func performAuthenticatedAPICall(withAccessToken token: String) async throws -> User {
	let url = URL(string: "api.example.com/user")!
	var request = URLRequest(url: url)
	request.setValue("Bearer \(token)", forHTTPHeaderField: "Authorization")
	let (data, _) = try await URLSession.shared.data(for: request)
	return try JSONDecoder().decode(User.self, from: data)
}
Sending data in the body of POST Requests
To send data to a REST API, you must use one of the HTTP methods that allow a request to contain a body. The most common method for this purpose is POST, but others like PUT and PATCH work similarly.
To provide the body data for a POST request, you typically use the upload(for:from:delegate:) method of URLSession. Although the URLRequest class has an httpBody property, it’s ignored when you use the aforementioned method.
The format of the request body depends on the REST API you’re using, often aligning with the format of the data the API returns, typically JSON.
You can encode your Codable Swift types using a JSONEncoder instance.
func sendData(for user: User, withAccessToken token: String) async throws {
	let url = URL(string: "api.example.com/user")!
	var request = URLRequest(url: url)
	request.httpMethod = "POST"
	request.setValue("Bearer \(token)", forHTTPHeaderField: "Authorization")
	let data = try JSONEncoder().encode(user)
	let (_, response) = try await URLSession.shared.upload(for: request, from: data)
	// Handle the response
}
POST requests must also be authenticated according to your REST API’s requirements.
Handling response status codes and eventual errors
Decoding the JSON data returned by the server may not be sufficient. REST API responses often contain additional information in the form of HTTP status codes or headers.
You can obtain a URLResponse object from the second position in the tuple returned by the URLSession method used to make the call. When the response comes from an HTTP server, like in the case of a REST API, the response object is usually an instance of the HTTPURLResponse subclass. However, the type of the returned object is always URLResponse, so you’ll need to downcast it.
Reading the data of a response can be valuable for fine-grained error handling. While URLSession methods already throw generic URLError values, you can also create custom API-specific errors.
func handleAPIResponse() async throws -> User {
	let url = URL(string: "api.example.com/user")!
	let (data, response) = try await URLSession.shared.data(from: url)
	guard let response = response as? HTTPURLResponse else {
		throw APIError.server
	}
	switch response.statusCode {
		case 400 ..< 500: throw APIError.client
		case 500 ..< 600: throw APIError.server
		default: break
	}
	return try JSONDecoder().decode(User.self, from: data)
}
How REST APIs deliver errors can vary widely.
For instance, the Stack Exchange API consistently returns a generic 400 Bad Request status code with further information encoded in the JSON wrapper.
In contrast, the GitHub API returns specific client errors and uses 404 Not Found or 403 Forbidden status codes for authentication errors instead of the typical 401 Unauthorized.
Using Swift Playgrounds, cURL, and Postman to inspect the responses of a REST API
While the Stack Exchange API offers the convenience of configuring and running API calls directly within its endpoint documentation pages, not all APIs provide such a feature.
You may sometimes load an API endpoint URL in your web browser to view its result, but this approach doesn’t work for authenticated HTTP requests or those with specific headers or a request body.
For a more versatile solution, you can run your Swift code in a playground to observe how an API responds to a request. Additionally, you have a couple of other options:
The first one is the cURL command line tool. Some API documentations provide sample cURL commands that you can copy and paste into your terminal.
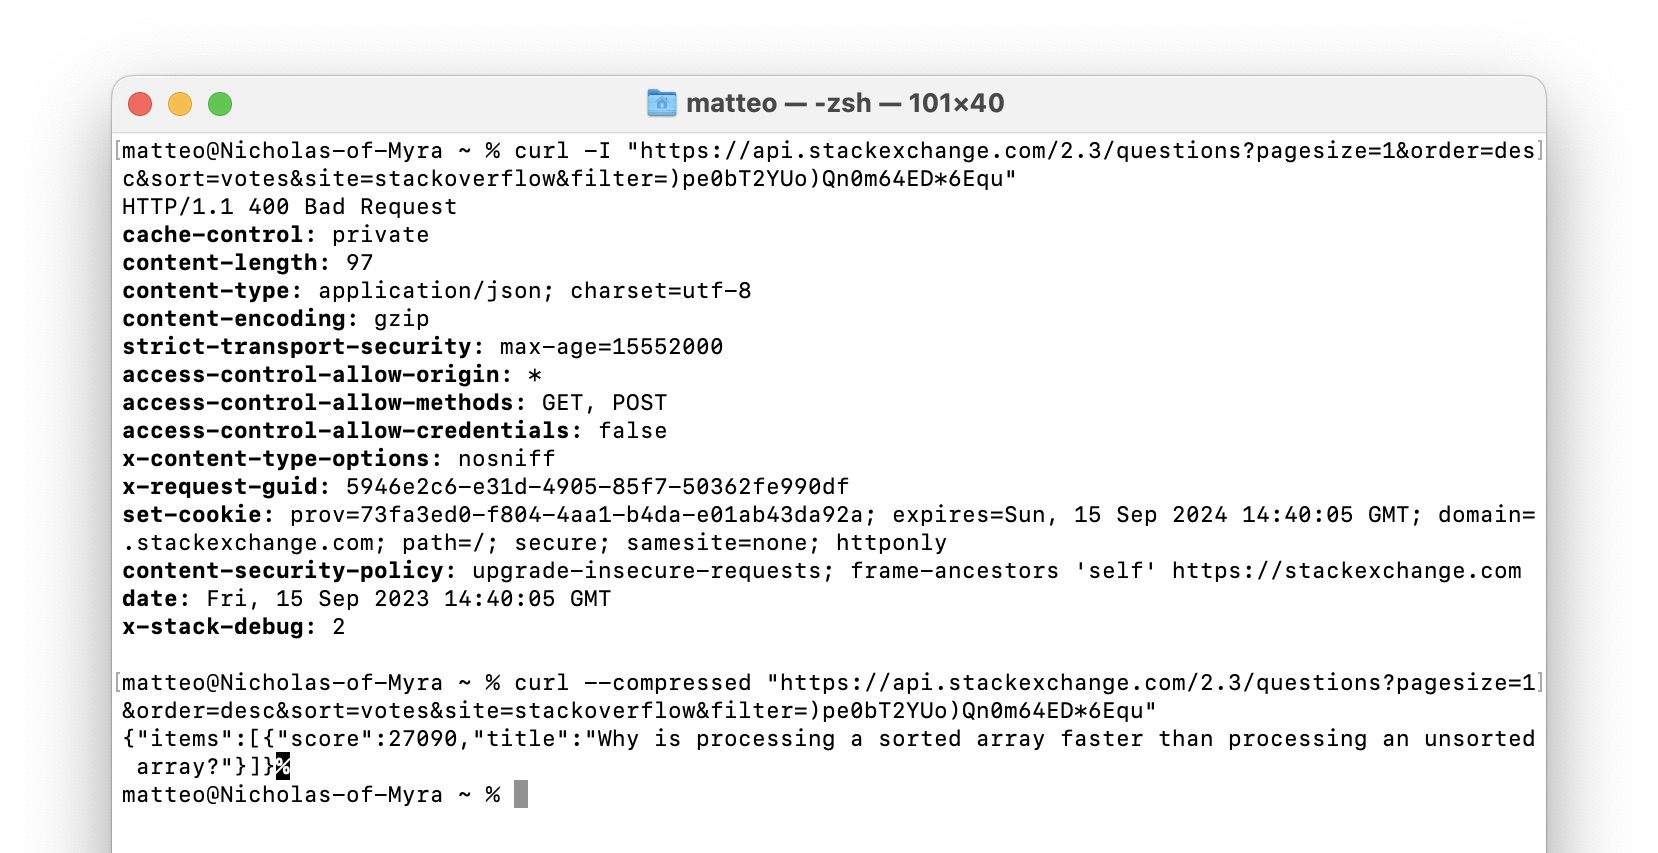
However, I don’t find this option convenient. curl is mainly intended to be used with other command line tools or shell scripts.
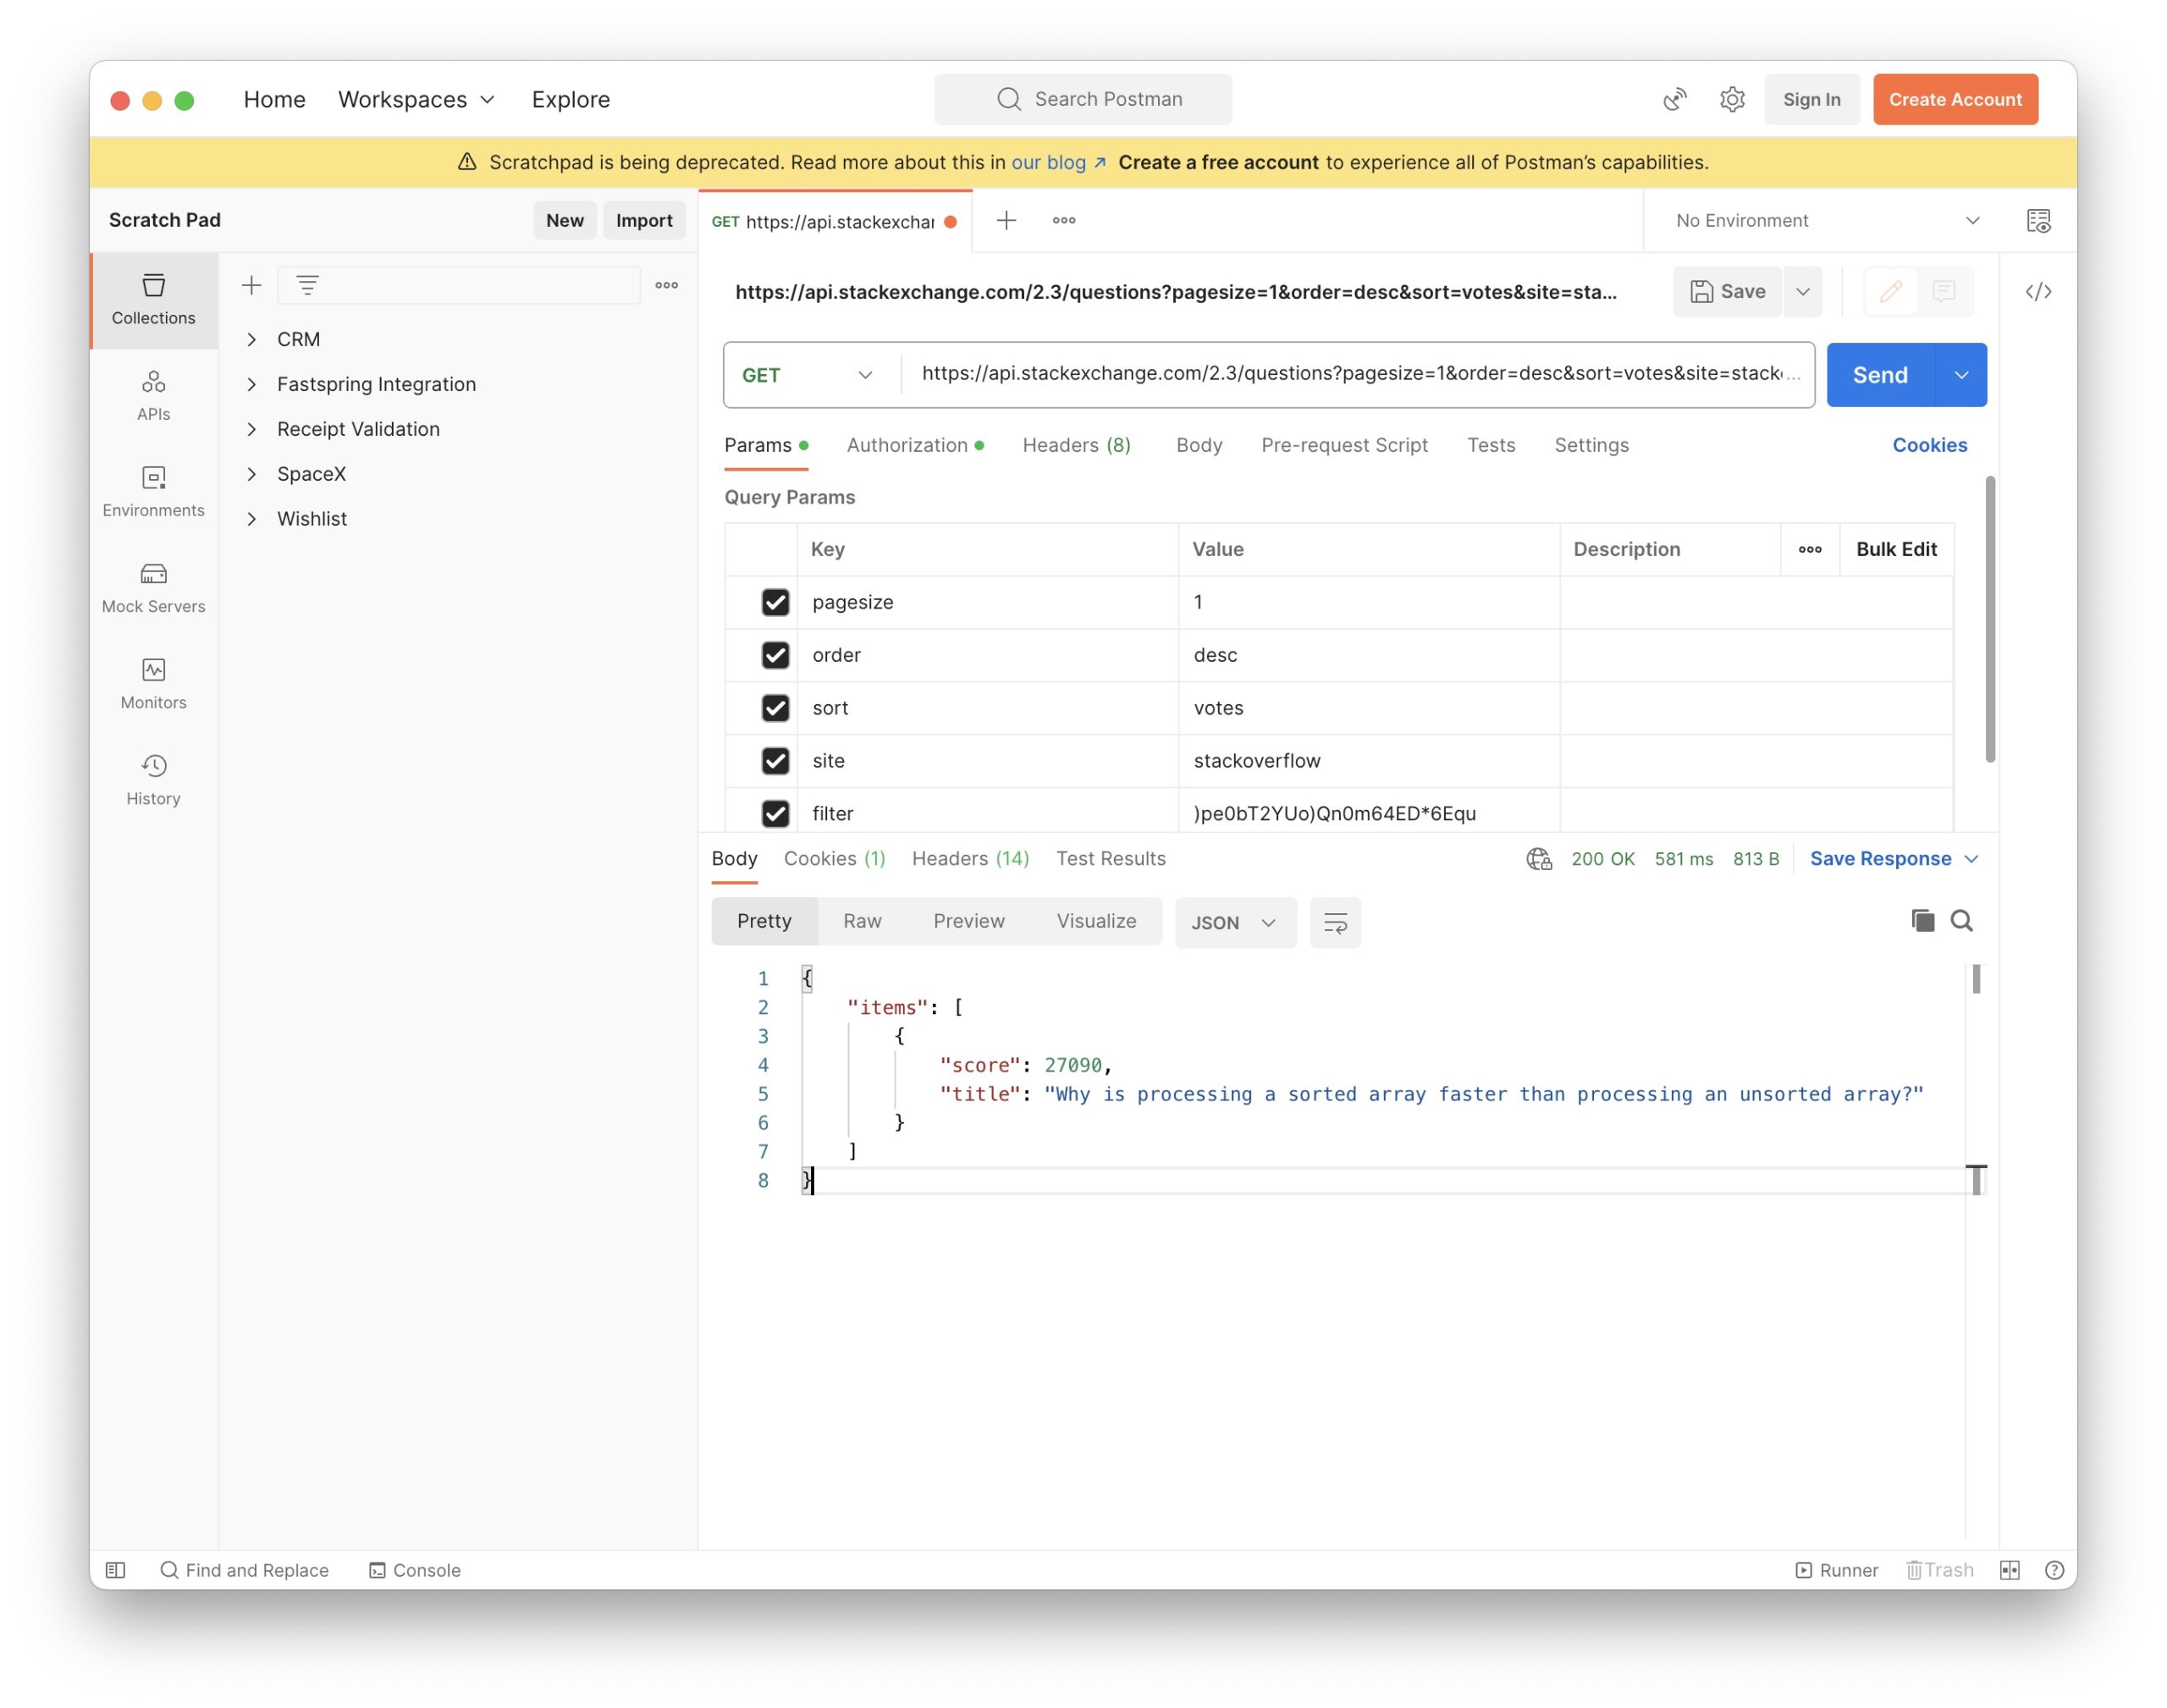
A far better option is Postman, which offers a graphical user interface that allows you to:
- Configure query string parameters and HTTP headers for a request.
- Add data to the request body and format response data.
- Save, duplicate, and customize API calls for reuse.
- Import the entire list of endpoints from APIs that follow the OpenAPI specification.
Chapter 4
Calling REST APIs from within an iOS app in SwiftUI
With all the details about REST API calls in Swift, we can now use them to construct a SwiftUI app. However, architectural challenges become apparent at this stage.
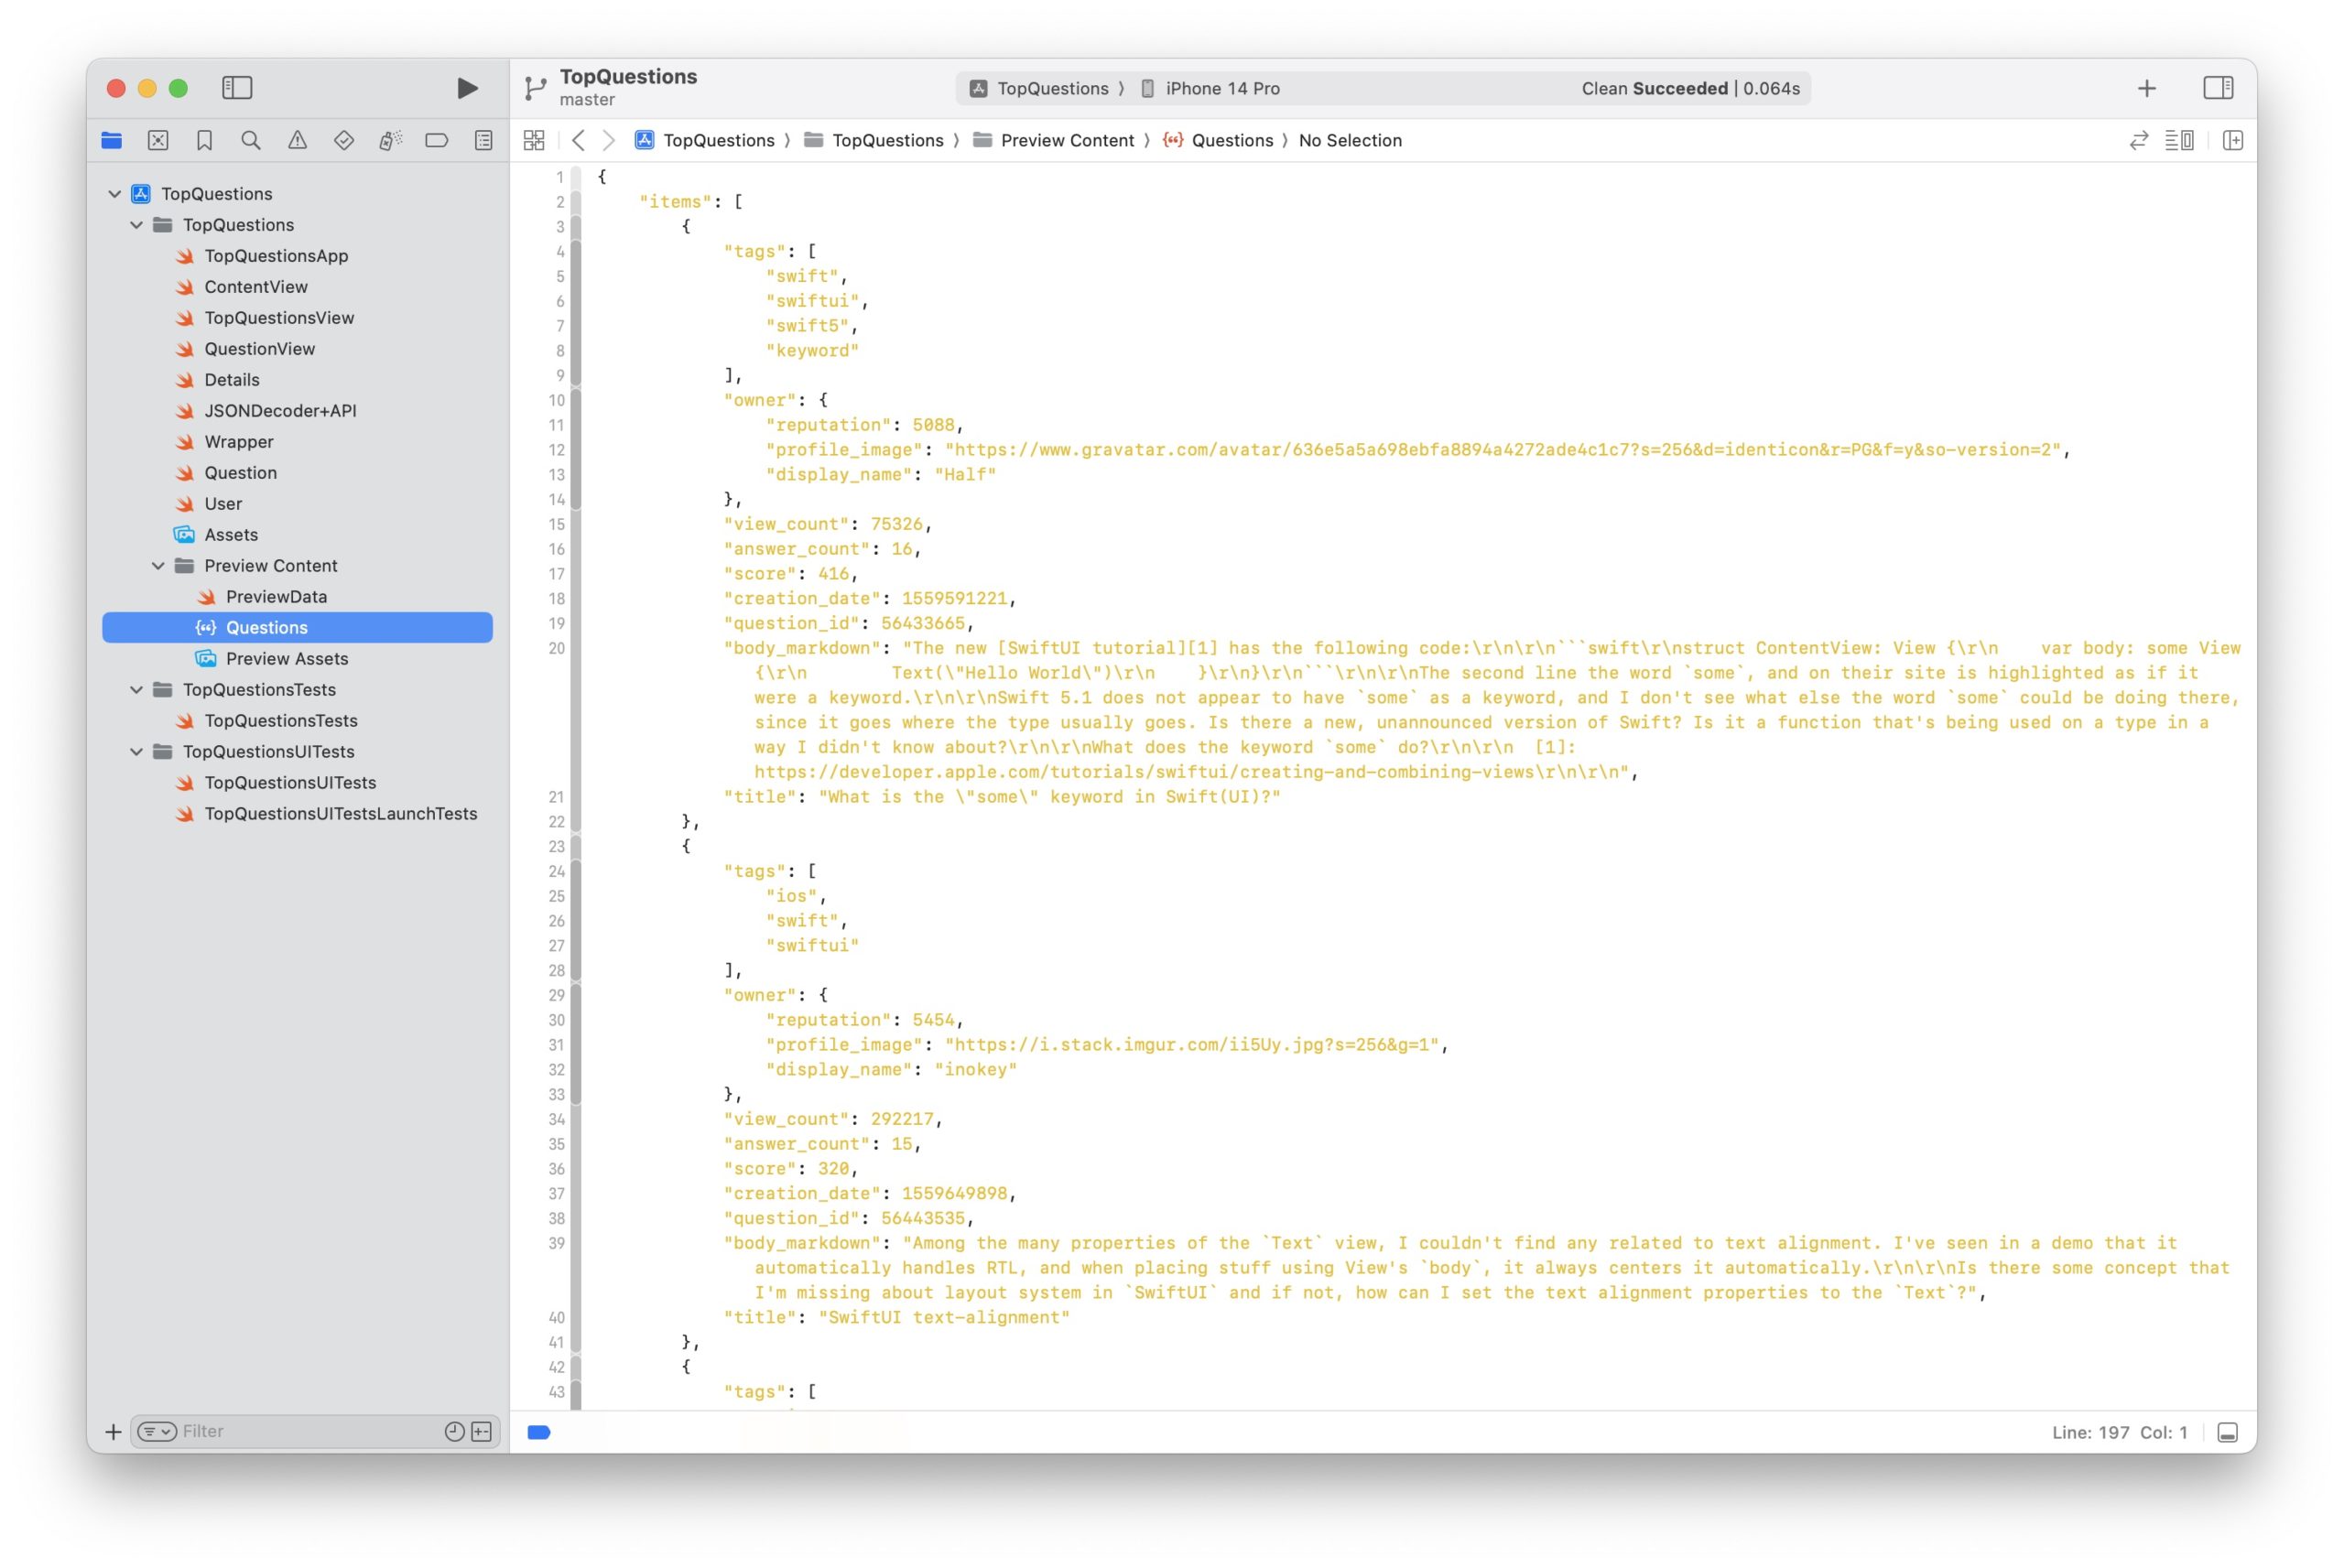
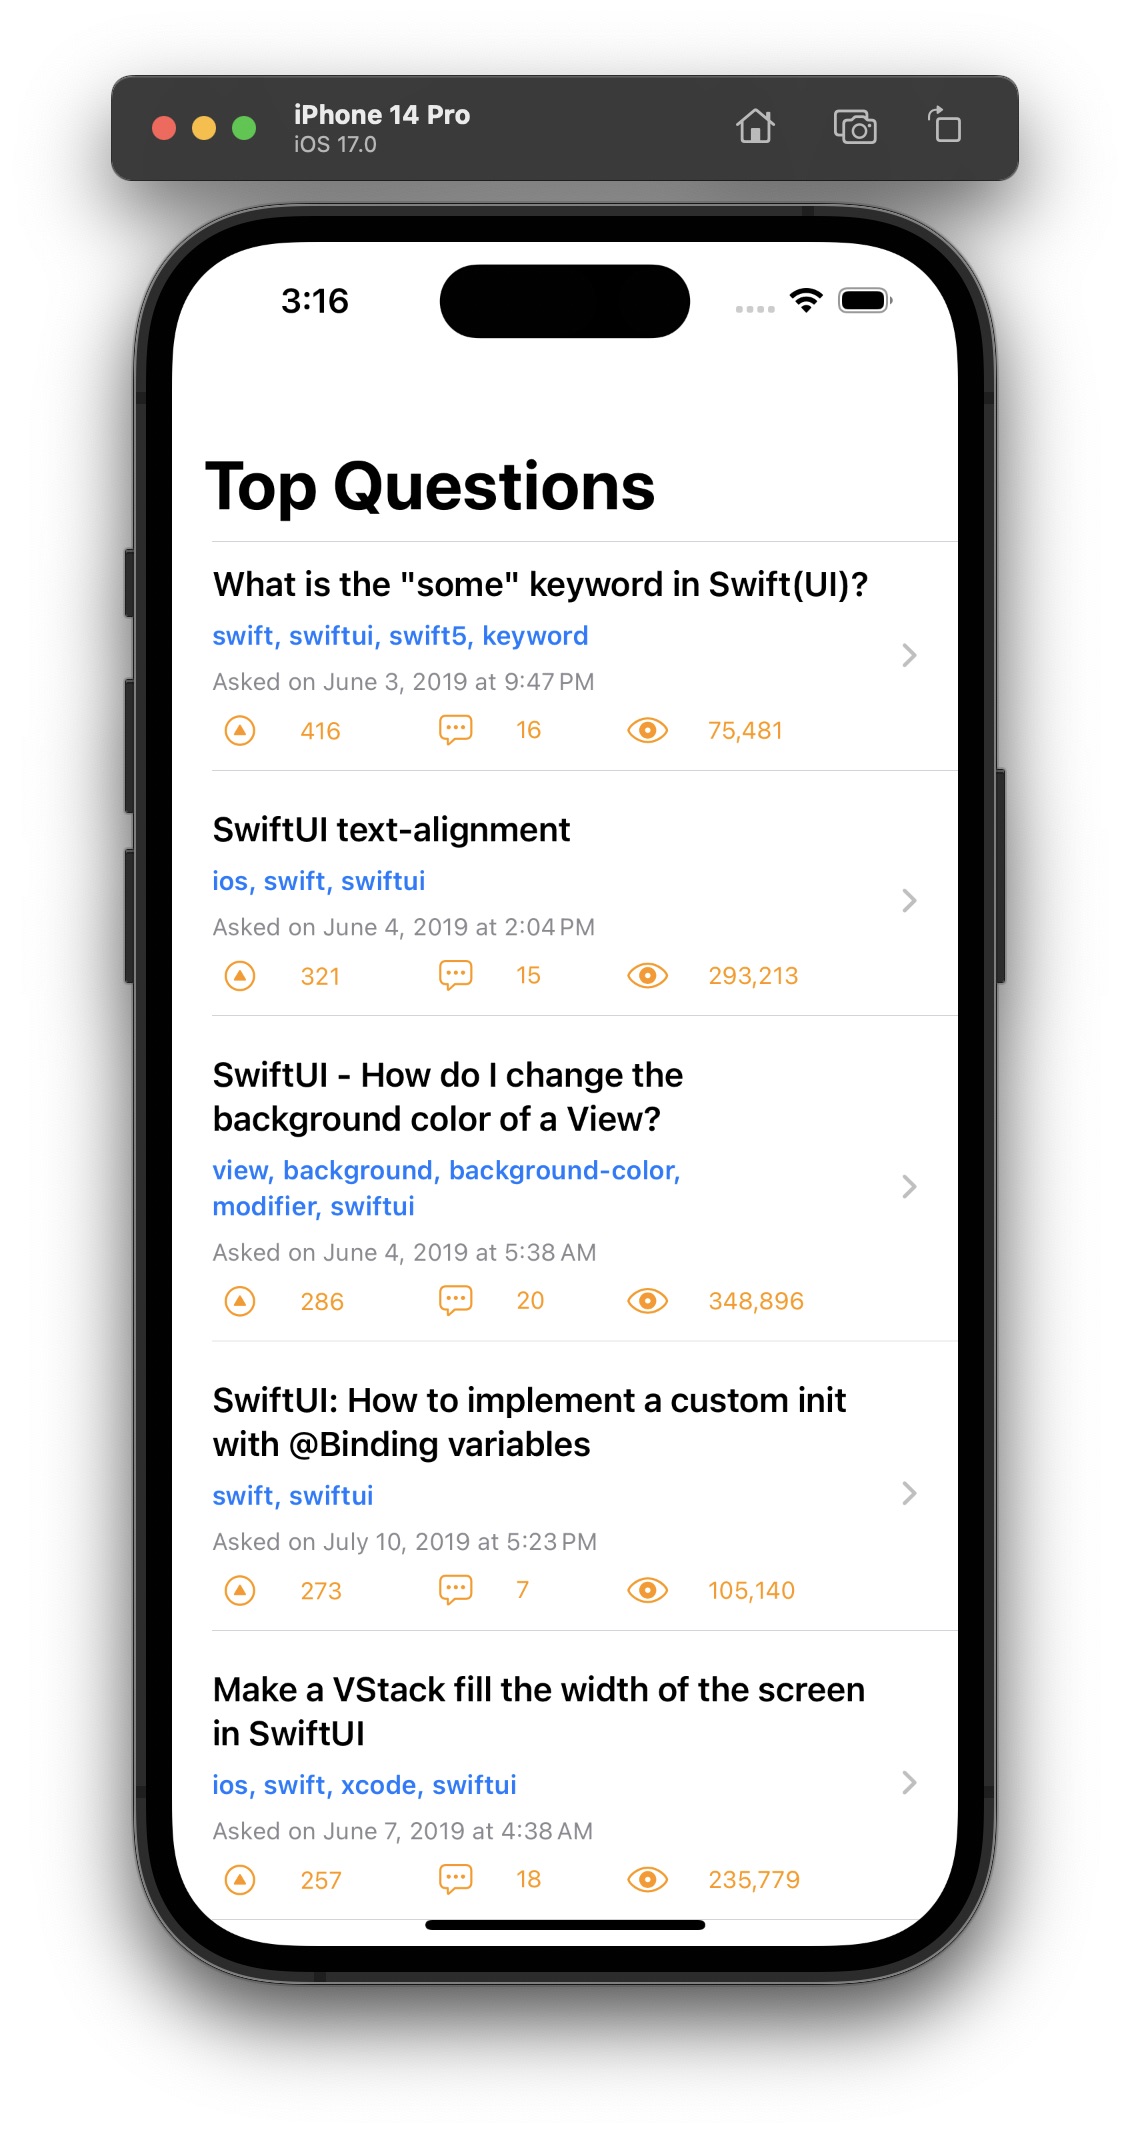
In the remainder of this article, we will develop a simple client app to retrieve the top SwiftUI-related questions from Stack Overflow. You can access the complete Xcode project on GitHub.

In this chapter:
FREE GUIDE - SwiftUI App Architecture: Design Patterns and Best Practices
MVC, MVVM, and MV in SwiftUI, plus practical lessons on code encapsulation and data flow.
DOWNLOAD THE FREE GUIDECreating model types to match the API entities
Regardless of the architectural pattern you choose for your app, you’ll need model types to represent the data and business logic. This is true whether you follow the vanilla MVC pattern, my four-layered version of MVC for SwiftUI, or any other MVC variant like MVVM.
In networked apps, respecting the REST API to conserve bandwidth is essential, as apps that misbehave can face restrictions or bans. Hence, our client app will only fetch the information needed for each screen, utilizing this and this3fFI\)sF9pUF13d.QOYHh2wF41eBt2dc&site=stackoverflow) configurations.
{
	"items": [
		{
			"tags": [
				"swift",
				"swiftui",
				"swift5",
				"keyword"
			],
			"owner": {
				"reputation": 5088,
				"profile_image": "https://www.gravatar.com/avatar/636e5a5a698ebfa8894a4272ade4c1c7?s=256&d=identicon&r=PG&f=y&so-version=2",
				"display_name": "Half"
			},
			"view_count": 75326,
			"score": 416,
			"creation_date": 1559591221,
			"question_id": 56433665,
			"body_markdown": "The new [SwiftUI tutorial][1] has the following code:\r\n\r\n```swift\r\nstruct ContentView: View {\r\n    var body: some View {\r\n        Text(\"Hello World\")\r\n    }\r\n}\r\n```\r\n\r\nThe second line the word `some`, and on their site is highlighted as if it were a keyword.\r\n\r\nSwift 5.1 does not appear to have `some` as a keyword, and I don't see what else the word `some` could be doing there, since it goes where the type usually goes. Is there a new, unannounced version of Swift? Is it a function that's being used on a type in a way I didn't know about?\r\n\r\nWhat does the keyword `some` do?\r\n\r\n  [1]: https://developer.apple.com/tutorials/swiftui/creating-and-combining-views\r\n\r\n",
			"title": "What is the \"some\" keyword in Swift(UI)?"
		}
	]
}
The owner data is returned as a separate object, so we need a distinct type in our model.
struct User: Hashable {
	let name: String
	let reputation: Int
	var profileImageURL: URL?
}

extension User: Codable {
	enum CodingKeys: String, CodingKey {
		case name = "display_name"
		case profileImageURL = "profile_image"
		case reputation
	}
}

struct Question: Identifiable, Hashable {
	let id: Int
	let score: Int
	let answerCount: Int
	let viewCount: Int
	let title: String
	let body: String?
	let date: Date
	let tags: [String]
	var owner: User?
}

extension Question: Codable {
	enum CodingKeys: String, CodingKey {
		case id = "question_id"
		case date = "creation_date"
		case answerCount = "answer_count"
		case viewCount = "view_count"
		case body = "body_markdown"
		case score, title, tags, owner
	}
}
We will need the Identifiable and Hashable protocols for SwiftUI in a moment, so I already added them here.
While it’s a valid point to keep model types decoupled from decoding, it’s rarely necessary. In most cases, model types and data align. However, this approach becomes more valuable when your app handles multiple independent data sources.
Providing test data to SwiftUI previews
We can save the JSON data we fetched in a Questions.json file within our Xcode project. This data enables us to create test data for use in SwiftUI previews.
extension JSONDecoder {
	static var apiDecoder: JSONDecoder {
		let decoder = JSONDecoder()
		decoder.dateDecodingStrategy = .secondsSince1970
		return decoder
	}
}

extension [Question] {
	static var preview: [Question] {
		let url = Bundle.main.url(forResource: "Questions", withExtension: "json")!
		let data = try! Data(contentsOf: url)
		let wrapper = try! JSONDecoder.apiDecoder.decode(Wrapper.self, from: data)
		return wrapper.items
	}
}

extension Question {
	static var preview: Question {
		[Question].preview[0]
	}
}

extension User {
	static var preview: User {
		Question.preview.owner!
	}
}
The JSON data and this code reside within the Xcode project’s Preview Content folder, ensuring they won’t be included in the final app.
I like to store the preview data in static properties because it simplifies its use in SwiftUI previews.
The JSONDecoder extension is helpful since we need a decoder with the same configuration every time we decode data from the API.
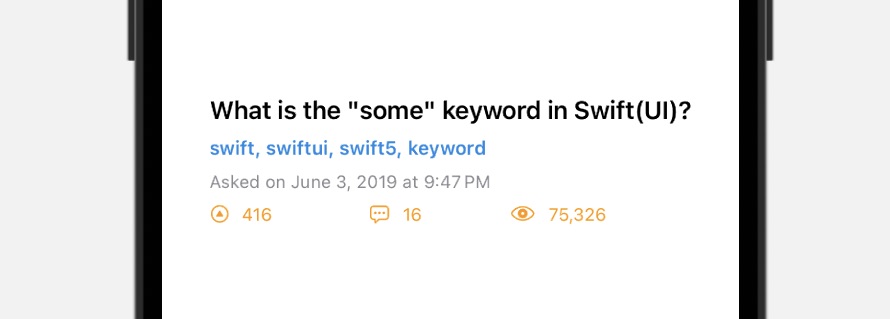
Structuring SwiftUI views independently from an app’s REST API integration
The interface of our app is straightforward to implement. Firstly, we can create a view for the standard UI elements shared by both screens.
struct Details: View {
	let question: Question

	var body: some View {
		VStack(alignment: .leading, spacing: 8.0) {
			Text(try! AttributedString(markdown: question.title))
				.font(.headline)
			Text(question.tagString)
				.font(.footnote)
				.bold()
				.foregroundColor(.accentColor)
			Text("Asked on " + question.date.formatted(date: .long, time: .shortened))
				.font(.caption)
				.foregroundColor(.secondary)
			ZStack(alignment: Alignment(horizontal: .leading, vertical: .center)) {
				Label("\(question.score)", systemImage: "arrowtriangle.up.circle")
				Label("\(question.answerCount)", systemImage: "ellipses.bubble")
					.padding(.leading, 108.0)
				Label("\(question.viewCount)", systemImage: "eye")
					.padding(.leading, 204.0)
			}
			.font(.caption)
			.foregroundColor(.orange)
		}
	}
}

extension Question {
	var tagString: String {
		tags[0] + tags.dropFirst().reduce("") { $0 + ", " + $1 }
	}
}

#Preview {
	Details(question: .preview)
}
Here, you can see how easily we use the preview static property we added to the Question type, thanks to Swift’s type inference.
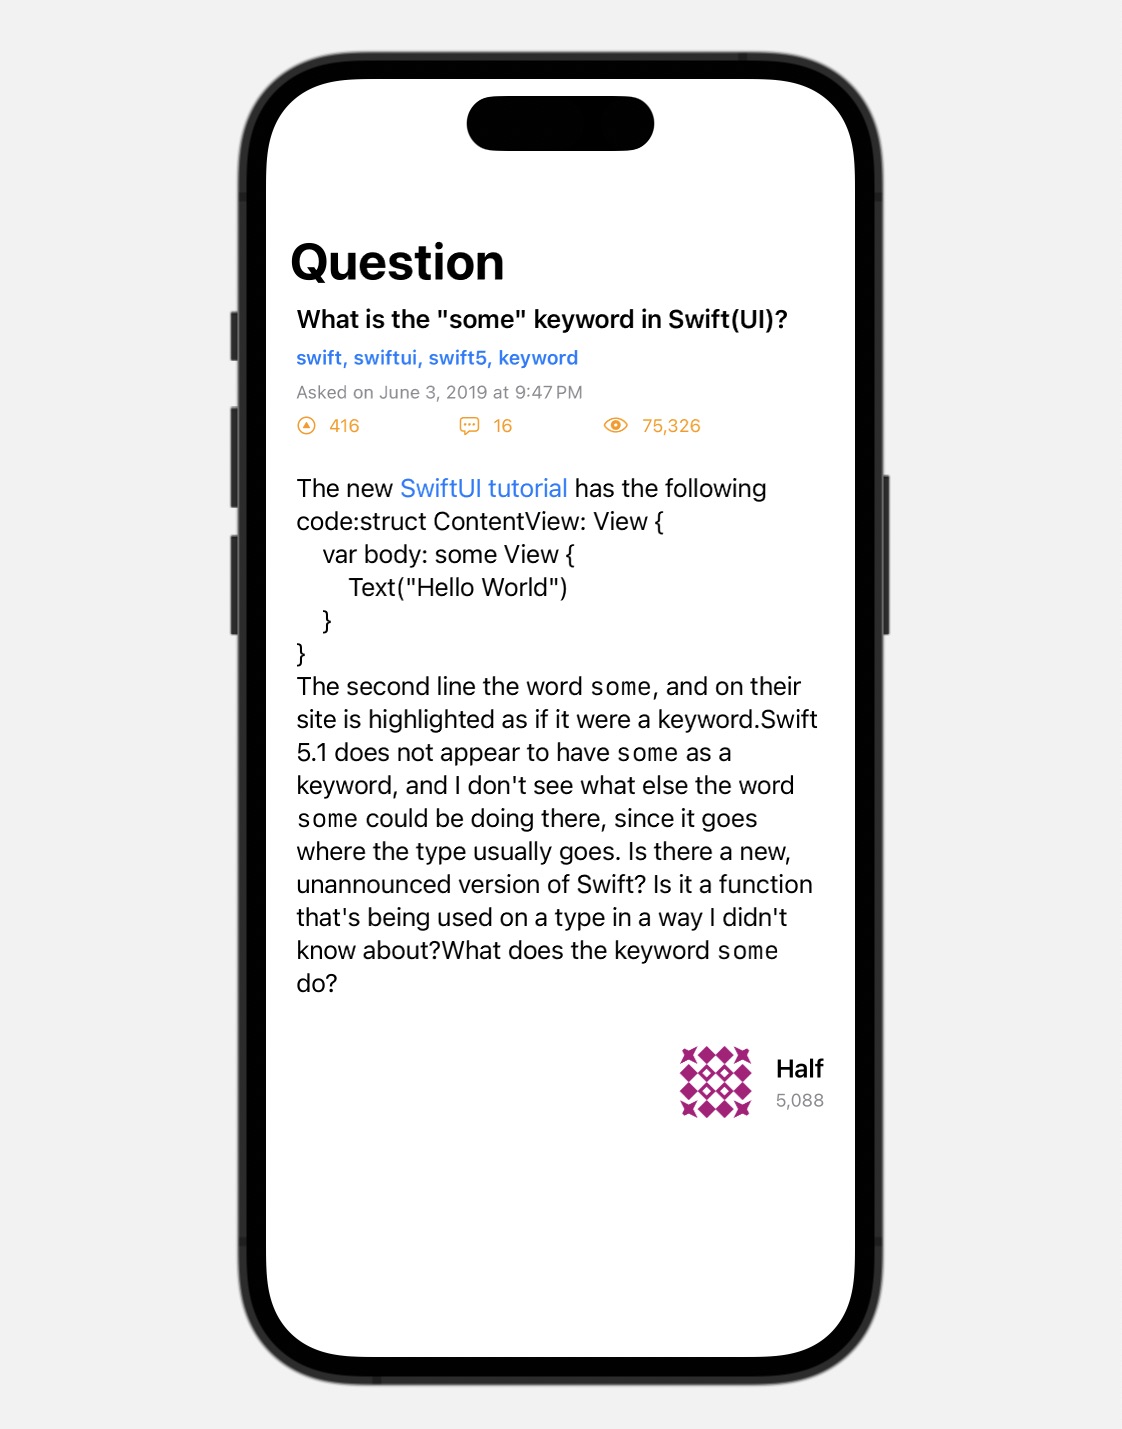
For the screen displaying a single question, we first require a view to show its owner.
struct Owner: View {
	let user: User

	var body: some View {
		HStack(spacing: 16.0) {
			AsyncImage(url: user.profileImageURL) { image in
				image
					.resizable()
					.frame(width: 48.0, height: 48.0)
					.cornerRadius(8.0)
					.foregroundColor(.secondary)
			} placeholder: {
				ProgressView()
			}
			VStack(alignment: .leading, spacing: 4.0) {
				Text(user.name)
					.font(.headline)
				Text("\(user.reputation)")
					.font(.caption)
					.foregroundColor(.secondary)
			}
		}
		.padding(.vertical, 8.0)
	}
}
The AsyncImage view is handy for displaying images from REST APIs. However, additional code is necessary if you need to save the image data, as discussed below.
Composing the entire view for the Question screen is straightforward.
struct QuestionView: View {
	let question: Question

	var body: some View {
		ScrollView(.vertical) {
			LazyVStack(alignment: .leading, spacing: 24.0) {
				Details(question: question)
				if let body = question.body {
					Text(try! AttributedString(markdown: body))
				}
				if let owner = question.owner {
					Owner(user: owner)
						.frame(maxWidth: .infinity, alignment: .trailing)
				}
			}
			.padding(.horizontal, 20.0)
		}
		.navigationTitle("Question")
	}
}

#Preview {
	NavigationStack {
		QuestionView(question: .preview)
	}
}
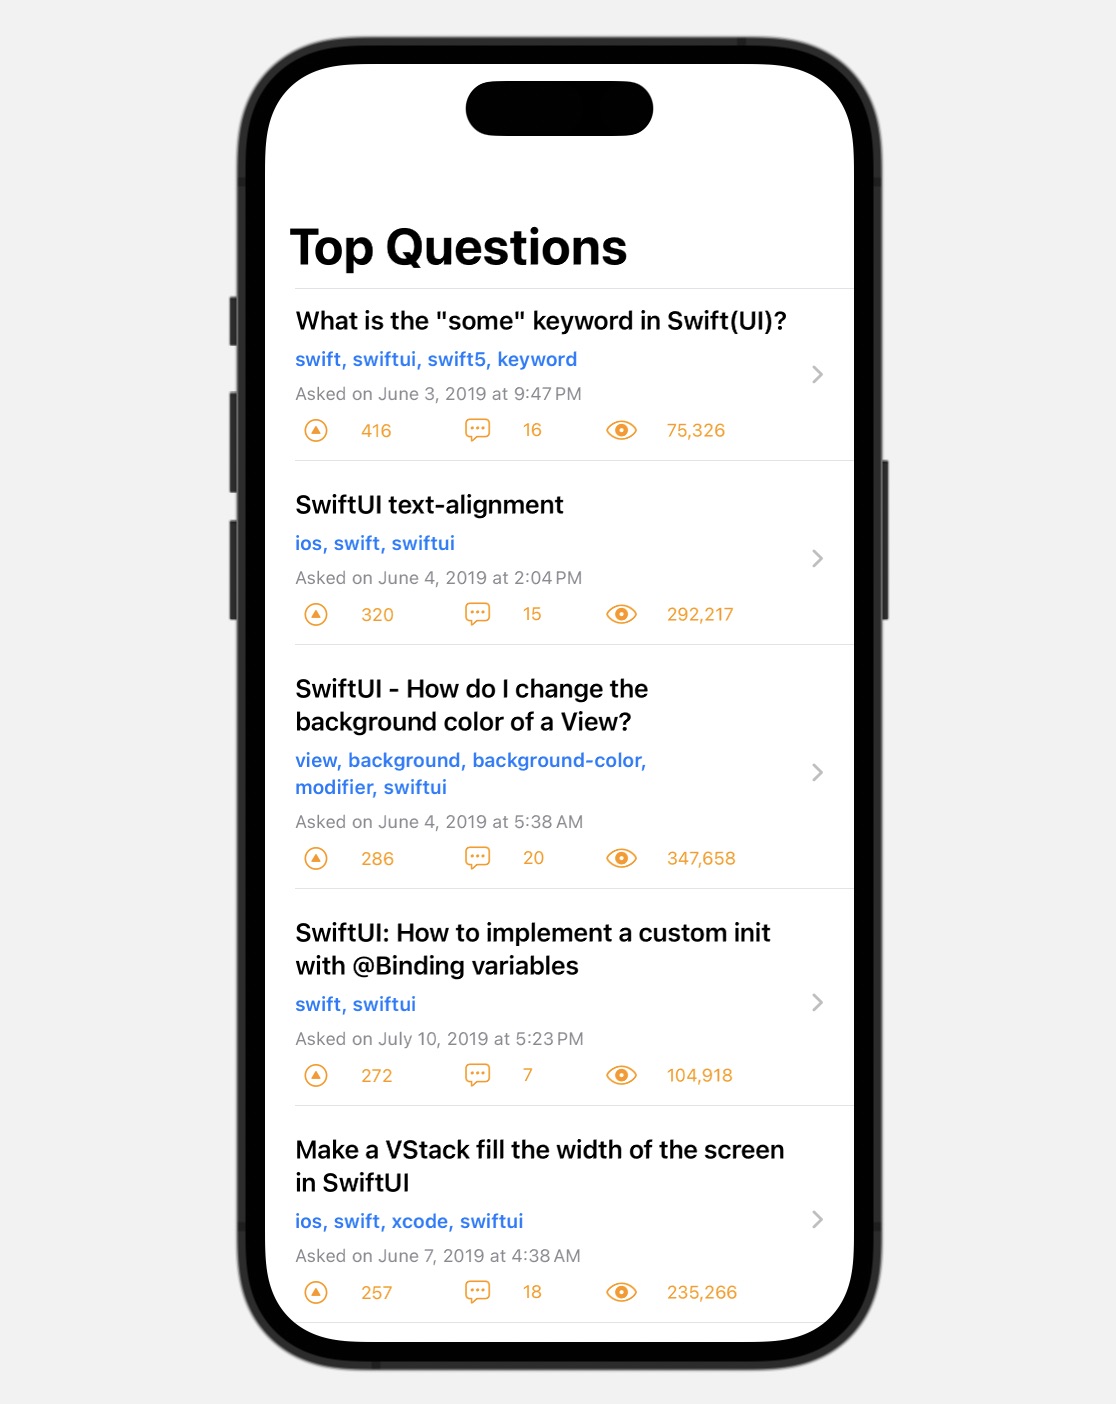
Implementing the view for the Top Questions screen is equally straightforward, thanks to the Details view implemented earlier.
struct ContentView: View {
	var body: some View {
		TopQuestionsView(questions: .preview)
	}
}

struct TopQuestionsView: View {
	let questions: [Question]

	var body: some View {
		List(questions) { question in
			NavigationLink(value: question) {
				Details(question: question)
					.alignmentGuide(.listRowSeparatorLeading) { d in d[.leading] }
			}
		}
		.listStyle(.plain)
		.listRowInsets(.none)
		.listRowSpacing(8.0)
		.navigationTitle("Top Questions")
		.navigationDestination(for: Question.self) { question in
			QuestionView(question: question)
		}
	}
}

#Preview {
	NavigationStack {
		TopQuestionsView(questions: .preview)
	}
}
Notice that REST API integration is not yet included in our SwiftUI views, which requires further discussion.
Common but suboptimal approaches to making REST API calls in iOS apps
At this point, we need to write async functions to fetch the top questions for the first app screen and the details of a question for the second screen.
Let’s assume we also need a method to download image data, a common requirement in apps that cache downloaded content.
class APIManager {
	func fetchTopQuestion() async throws -> [Question] {
		let url = URL(string: "https://api.stackexchange.com/2.3/questions?pagesize=10&order=desc&sort=votes&tagged=swiftui&site=stackoverflow&filter=L7V2EDvuysm0H*BIB_.(egYSjq")!
		let (data, _) = try await URLSession.shared.data(from: url)
		let wrapper = try JSONDecoder().decode(Wrapper.self, from: data)
		return wrapper.items
	}

	func fetchQuestion(withID id: Int) async throws -> Question {
		let url = URL(string: "https://api.stackexchange.com/2.3/questions/\(id)?&filter=)3fFI)sF9pUF13d.QOYHh2wF41eBt2dc")!
		let (data, _) = try await URLSession.shared.data(from: url)
		let wrapper = try JSONDecoder().decode(Wrapper.self, from: data)
		return wrapper.items[0]
	}

	func fetchImage(withURL url: URL) async throws -> Data {
		let (data, _) = try await URLSession.shared.data(from: url)
		return data
	}
}
We’ve encapsulated all methods within an APIManager class, adhering to the separation of concerns principle. However, these methods look too similar, thus violating the don’t repeat yourself principle.
Encoding the API endpoint URLs using a Swift enumeration
Many developers turn to enumerations in situations like this.
enum Endpoint {
	case questions
	case question(id: Int)
	case image(url: URL)
}
At first glance, this choice seems logical. After all, Swift enums align well with listing API endpoints. This enumeration allows us to systematically generate API endpoint URLs based on the chosen Endpoint case.
enum Endpoint {
	case questions
	case question(id: Int)
	case image(url: URL)

	var url: URL {
		if case let .image(url: url) = self {
			return url
		}
		let rootEndpoint = URL(string: "https://api.stackexchange.com/2.3")!
		var path = ""
		var filter = ""
		switch self {
			case .questions:
				path = "questions"
				filter = "L7V2EDvuysm0H*BIB_.(egYSjq"
			case .question(id: let id):
				path = "questions/\(id)"
				filter = ")3fFI)sF9pUF13d.QOYHh2wF41eBt2dc"
			default: break
		}
		return rootEndpoint
			.appending(path: path)
			.appending(queryItems: [
				URLQueryItem(name: "site", value: "stackoverflow"),
				URLQueryItem(name: "order", value: "desc"),
				URLQueryItem(name: "sort", value: "votes"),
				URLQueryItem(name: "tagged", value: "swiftui"),
				URLQueryItem(name: "pagesize", value: "10"),
				URLQueryItem(name: "filter", value: filter)
			])
	}
}
Now, we can abstract all the APIManager methods into a single, versatile, generic method.
class APIManager {
	func load(endpoint: Endpoint) async throws -> T {
		let (data, _) = try await URLSession.shared.data(from: endpoint.url)
		switch endpoint {
			case .image(url: _): return data as! T
			case .questions:
				let wrapper = try JSONDecoder().decode(Wrapper.self, from: data)
				return wrapper.items.first as! T
			case .question(id: _):
				let wrapper = try JSONDecoder().decode(Wrapper.self, from: data)
				return wrapper.items as! T
		}
	}
}
Reducing our API call management to only two methods might seem elegant. However, it falls short because it violates the Open-closed principle.
Both methods must be modified whenever a new API endpoint must be incorporated. A single oversight can introduce hidden bugs that can impact substantial portions of our application.
This situation is likely to worsen as additional factors come into play. Imagine selecting the appropriate HTTP method for your call, incorporating HTTP headers into the request, adjusting query string parameters, and interpreting status codes and HTTP response headers.
Creating a generic API request structure
At this juncture, you may consider another frequently encountered approach. Crafting a generic type capable of encapsulating all essential API call parameters.
public struct Request {
	let id: Int?
	let path: String
	let filter: String

	var url: URL {
		let rootEndpoint = URL(string: "https://api.stackexchange.com/2.3")!
		return rootEndpoint
			.appending(path: path + (id == nil ? "" : "\(id!)"))
			.appending(queryItems: [
				URLQueryItem(name: "site", value: "stackoverflow"),
				URLQueryItem(name: "order", value: "desc"),
				URLQueryItem(name: "sort", value: "votes"),
				URLQueryItem(name: "tagged", value: "swiftui"),
				URLQueryItem(name: "pagesize", value: "10"),
				URLQueryItem(name: "filter", value: filter)
			])
	}
}

class APIManager {
	func fetchImage(withURL url: URL) async throws -> Data {
		// ...
	}

	func perform(request: Request) async throws -> [T] {
		let (data, _) = try await URLSession.shared.data(from: request.url)
		let wrapper = try JSONDecoder().decode(Wrapper.self, from: data)
		return wrapper.items
	}
}
In this context, I’ve had to separate the image retrieval process into a distinct method because binary image data isn’t Codable.
Such a generic type is commonly named Request or Resource. I prefer the latter since it distinctly denotes a remote resource on the server, as we’ll see throughout this article.
One downside to this method is that it pushes implementation details up the call stack. The code responsible for making API requests must become aware of low-level specifics, such as endpoint paths and filters to apply to the request.
This leads to several problems:
- It breaks encapsulation, contravening the separation of concerns principle.
- It leads to repetitions in the calling code, disregarding the don’t repeat yourself principle.
- It violates the dependency inversion principle.
Hiding the implementation details of a request using the builder pattern
Fortunately, these issues can be mitigated by introducing builder methods that craft specialized requests, effectively concealing these details from the caller.
extension Request {
	static func questions() -> Request {
		Request(id: nil, path: "/questions", filter: "L7V2EDvuysm0H*BIB_.(egYSjq")
	}

	static func question(id: Int) -> Request {
		Request(id: id, path: "/questions", filter: ")3fFI)sF9pUF13d.QOYHh2wF41eBt2dc")
	}
}
This represents an improvement over the enumeration example. However, it still has a problem.
Not all API calls share uniform characteristics. Even within the Stack Exchange API endpoints, distinctions emerge – some employ IDs, while others rely on slugs or tags.
Addressing these variations would necessitate adding more stored properties and methods to the Request type.
However, these additions would be required by specific requests but irrelevant to others, once again violating the separation of concerns principle. Furthermore, this would introduce interface pollution, violating the interface segregation principle.
Chapter 5
Protocol-oriented networking layer architecture in Swift
Standard architectural approaches to the network layer of an iOS app often violate common design principles, resulting in repetitive code that needs constant modification to accommodate new network requests and data types. By adopting a protocol-oriented approach, these issues can be avoided.
In this chapter:
FREE GUIDE - SwiftUI App Architecture: Design Patterns and Best Practices
MVC, MVVM, and MV in SwiftUI, plus practical lessons on code encapsulation and data flow.
DOWNLOAD THE FREE GUIDEAbstracting API resources with protocols, generics, and extensions
The generic Request approach described earlier is a step in the right direction. All remote resources should be represented by a corresponding model type in our app.
However, encapsulating too much abstraction within a single type can be problematic. In our approach, we’ll use Swift protocols to define the taxonomy of our remote resources.
Let’s begin with the resources provided by the REST API, which must have:
- A URL ending with a path specifying the entity we’re fetching, e.g.,
/question. - Optional query string parameters to filter or sort the response data.
- An associated model type for decoding the JSON response data.
protocol APIResource {
	associatedtype ModelType: Codable
	var methodPath: String { get }
	var filter: String? { get }
}

extension APIResource {
	var url: URL {
		let url = URL(string: "https://api.stackexchange.com/2.3")!
			.appendingPathComponent(methodPath)
			.appending(queryItems: [
				URLQueryItem(name: "site", value: "stackoverflow"),
				URLQueryItem(name: "order", value: "desc"),
				URLQueryItem(name: "sort", value: "votes"),
				URLQueryItem(name: "tagged", value: "swiftui"),
				URLQueryItem(name: "pagesize", value: "10")
			])
		guard let filter else { return url }
		return url.appending(queryItems: [URLQueryItem(name: "filter", value: filter)])
	}
}
Most query string parameters are hardcoded in our case, but the APIResource protocol’s requirements can be extended for more granular control.
Now, we can create concrete structures for questions, answers, users, or any other entity returned by the Stack Echange API. In our app, we only need a resource for questions.
struct QuestionsResource: APIResource {
	typealias ModelType = Question
	var id: Int?

	var methodPath: String {
		guard let id else { return "/questions" }
		return "/questions/\(id)"
	}

	var filter: String? {
		id == nil
		? "L7V2EDvuysm0H*BIB_.(egYSjq"
		: ")3fFI)sF9pUF13d.QOYHh2wF41eBt2dc"
	}
}
Unifying the implementation of network requests
With a representation of the API resources, we can model our network requests.
However, not all network requests are directed to a REST API; media files like images are typically hosted on a CDN. This necessitates keeping our networking code generic and not tied to the APIResource protocol.
We’ll start by examining the requirements of a generic network request, which include:
- A method for decoding the received data into a model type.
- A method for initiating the asynchronous data transfer.
- An associated model type for decoding the downloaded data.
protocol NetworkRequest: AnyObject {
	associatedtype ModelType
	func decode(_ data: Data) throws -> ModelType
	func execute() async throws -> ModelType
}

extension NetworkRequest {
	func load(_ url: URL) async throws -> ModelType {
		let (data, _) = try await URLSession.shared.data(from: url)
		return try decode(data)
	}
}
Thanks to the load(_:) method in the protocol extension, all network requests share the URLSession code, eliminating code repetition.
Implementing network request for images
Now, let’s create a class for image requests, the simplest type of network request for which we only need a URL.
class ImageRequest {
	let url: URL

	init(url: URL) {
		self.url = url
	}
}

extension ImageRequest: NetworkRequest {
	func decode(_ data: Data) throws -> URL? {
		let dataString = data.base64EncodedString()
		return URL(string: "data:image/png;base64," + dataString)!
	}

	func execute() async throws -> URL? {
		try await load(url)
	}
}
Typically, we’d return the raw image Data to be saved on disk. For simplicity, I’ve converted it into an in-memory data URL for direct use in the AsyncImage view. The crucial point is that any network request type can decode data according to the data format it receives.
Implementing API requests
Following the same process, we can create a class for API requests.
class APIRequest {
	let resource: Resource

	init(resource: Resource) {
		self.resource = resource
	}
}

extension APIRequest: NetworkRequest {
	func decode(_ data: Data) throws -> [Resource.ModelType] {
		let wrapper = try JSONDecoder.apiDecoder
			.decode(Wrapper.self, from: data)
		return wrapper.items
	}

	func execute() async throws -> [Resource.ModelType] {
		try await load(resource.url)
	}
}
The APIRequest class utilizes a generic Resource type that must conform to APIResource. Since the API consistently returns JSON data, we decode it using a JSONDecoder.
We now have an extensible, protocol-oriented architecture that can be expanded. You can add new API resources or introduce new network request types to send data or retrieve different media files.

Performing API calls inside view models
Network requests are executed within view models, following the MVVM pattern. Let’s start with the first screen of our app.
Firstly, we need a view model object to fetch the top questions from Stack Overflow.
extension TopQuestionsView {
	@Observable class Model {
		private(set) var questions: [Question] = []
		private(set) var isLoading = false

		@MainActor func fetchTopQuestions() async throws {
			guard !isLoading else { return }
			defer { isLoading = false }
			isLoading = true
			let resource = QuestionsResource()
			let request = APIRequest(resource: resource)
			questions = try await request.execute()
		}
	}
}
At this level, all we need to do is:
- Create a
QuestionsResourcevalue. - Pass it to an
APIRequestinstance. - Execute the network request.
- Store the returned questions in a stored property.
Since our class is @Observable, any updates trigger a refresh in the SwiftUI view.
We create a Model instance within the TopQuestionsView, invoking the model’s fetchTopQuestions() method when the view appears or the user pulls to refresh.
struct TopQuestionsView: View {
	@State private var model = Model()

	var body: some View {
		List(model.questions) { question in
			NavigationLink(value: question) {
				Details(question: question)
					.alignmentGuide(.listRowSeparatorLeading) { d in d[.leading] }
			}
		}
		.listStyle(.plain)
		.listRowInsets(.none)
		.listRowSpacing(8.0)
		.navigationTitle("Top Questions")
		.task { try? await model.fetchTopQuestions() }
		.refreshable { try? await model.fetchTopQuestions() }
		.navigationDestination(for: Question.self) { question in
			QuestionView(question: question)
		}
	}
}
Observe how our networking infrastructure is completely hidden from both the view and the view model, which don’t need to be concerned with sessions, URLs, or JSON decoding.
The exact process is repeated for the QuestionView type.
extension QuestionView {
	@Observable class Model {
		private(set) var question: Question
		private(set) var isLoading = false

		init(question: Question) {
			self.question = question
		}

		func loadQuestion() async throws {
			guard !isLoading else { return }
			defer { isLoading = false }
			isLoading = true
			let resource = QuestionsResource(id: question.id)
			let request = APIRequest(resource: resource)
			let questions = try await request.execute()
			guard let question = questions.first else { return }
			self.question = question
			guard let url = question.owner?.profileImageURL else { return }
			let imageRequest = ImageRequest(url: url)
			self.question.owner?.profileImageURL = try await imageRequest.execute()
		}
	}
}
Here, we fetch the question data and then the user data sequentially because the user data arrives only after the initial request.
struct QuestionView: View {
	@State private var model: Model

	init(question: Question) {
		let model = Model(question: question)
		self._model = .init(initialValue: model)
	}

	var body: some View {
		ScrollView(.vertical) {
			LazyVStack(alignment: .leading, spacing: 24.0) {
				Details(question: model.question)
				if model.isLoading {
					ProgressView()
						.frame(maxWidth: .infinity, alignment: .center)
				} else {
					if let body = model.question.body {
						Text(try! AttributedString(markdown: body))
					}
					if let owner = model.question.owner {
						Owner(user: owner)
							.frame(maxWidth: .infinity, alignment: .trailing)
					}
				}
			}
			.padding(.horizontal, 20.0)
		}
		.navigationTitle("Question")
		.task { try? await model.loadQuestion() }
	}
}
Since the view model for the QuestionView requires a Question value in its initializer, we provide it using the init(initialValue:) initializer of the @State property wrapper.
Running the completed app in the simulator
Finally, you can run the app in the simulator and observe it fetching data directly from the Stack Exchange API.
If you have a fast internet connection, loading question details may occur instantaneously. If you provide a loading interface and want to see how it behaves on a slow internet connection, you can use the network link conditioner to slow down your app.
Conclusions
In this article, we explored the implementation of REST API functionality and the organization of the networking layer within your SwiftUI applications.
Although the sample application we’ve constructed is basic, it’s evident that it introduces a considerable level of intricacy.
Skillfully designing your networking code is an investment that yields numerous benefits in the long run. This approach facilitates the seamless addition of new API calls to your application, fostering greater code reuse and reducing the likelihood of bugs.
SwiftUI App Architecture: Design Patterns and Best Practices
It's easy to make an app by throwing some code together. But without best practices and robust architecture, you soon end up with unmanageable spaghetti code. In this guide I'll show you how to properly structure SwiftUI apps.
Matteo has been developing apps for iOS since 2008. He has been teaching iOS development best practices to hundreds of students since 2015 and he is the developer of Vulcan, a macOS app to generate SwiftUI code. Before that he was a freelance iOS developer for small and big clients, including TomTom, Squla, Siilo, and Layar. Matteo got a master’s degree in computer science and computational logic at the University of Turin. In his spare time he dances and teaches tango.
Thanks for the great article!
Matteo, How can I buy you some beer :)?
I will cover MVVM too some day. Too much stuff to cover!
This is great!!, Developers often find it difficult to deal with REST API and URL calls, They can get a working figure here
Very helpful, thank you!
Two small corrections, configureUI() is missing the line `askedLabel.text = question.date.timeAgo`; and in `timeAgo`, it should read `+ (month != 1 ? “months” : “month”)`, otherwise it will display “0 month”, instead of “0 months”.
Awesome Article. What I could not learn in past 3 years, I got to know within 2 hours. Great Job Matteo Manferdini
Thanks a lot!!!
This was a terrific article. I might suggest you do your networking on a background thread and then pass off the parsed data to the main queue once it’s back from the server and parsed. I hate seeing asynchronous network calls on the main thread. But handling your networking on a background thread only helps if you let the user keep doing things and update the UI asynchronously once data arrives. And we’ve been bit by the headaches of using AFNetworking. Your points on why not to use a library are well founded.
Indeed, I did not cover updating the UI in the main thread because this article was already pretty long, but it’s definitely the correct way to do it. Updating UI from a background thread causes all sorts of weird behaviors.
Is that why the avatar image is taking forever to load?
I liked the article but it made me think that JSON could be replaced by protocol buffers
Well, of course you could, this was just an article on REST and JSON and in many cases you don’t have a choice over the format, if you use someone else’s API.
But in your own you can use protocol buffers. The concepts would be the same though, as it would the code structure.
I agree with you, but maybe one could get rid of the JSON validation/serialization part
Maybe this article should have been divided into smaller pieces: there’s a lot of information. Two weak points (imho):
1. the code after the sentence “First, we write some code to better interact with the JSON objects in Swift, to remove all the string literals and the type casting” is not explained (enough);
2. in a real life scenario, the network class should: set parameters, set headers, set GET/POST/etc., set token (bearers), authorization, etc.
Now, while I understand the need of a clean architecture, I feel, as a developer, that anything here should be kept simple. I’m quite sure you strive to be simple, but the resulting solution is finally quite complex.
Point 1 is explained in the linked article, so I did not repeat the explanation here.
Regarding point 2, yes, a real app has to deal with all those things, and that is the reason behind this structure. Of course, for a single call in an app with only one screen this is a bit too much.
But this architecture is exactly for cases where you have all those parameters to attach to a network request.
Well, but why the need to transform JSON into entities on the fly? While I understand the validation of JSON keys values, I don’t understand why I should create objects out of my data: data is only data, it has no name, have you ever seen a client side (eg. plain, vanilla JS or AS3 or even PHP or Python or whatever) creating entities before displaying data? It’s a lot of work for basically the same results.
Data is rarely only data. It usually has logic attached. If you don’t create model types, you will have to place such logic into other objects, like view controllers, and probably duplicate it or share it through more complicated mechanisms.
Also, model types are, well, typed. Raw data has no type. With the latter, you can pass by mistake a question to a method or an object that might need a user. With concrete types the compiler will prevent this.
+1 You did quote parameters, headers, other HTTP methods, authorization, etc.
It would be nice if Matteo could show us a complete example of doing network with his amazing approach.
At some point I will, but that might take a while. There is so much to write about!
Maybe, at request time you could define which model the data coming from the server should conform to, eg. getData(model:Questions), this way you could get rid of the switch.
Yes, there are many solutions for this. Generics and protocols are also a possibility, but I didn’t want to complicate too much the code.
I want to say another thing (sorry for disturbing!): app development is becoming more complicated than it was in the past. Apps are not done by single developers anymore but there can be teams and in teams people come and go. So: imagine this in the context of a company that develop products using PHP: do they need a developer that knows PHP or do they prefer a developer who knows Symfony? If my business is based on Symfony, I don’t care if a developer has built his own framework or CMS: that is, I’m happy if he is able to do this, but, since my products are Symfony-based, he can be up and running in minutes if he knows how this framework works. This is the same with Alamofire etc.: ok, a company can develop its own network code, but if the last developer of the team goes away, aside from the fact that the network architecture must be well documented, the new developer must understand it to be able to refactor, etc., while with a known solution, the developer can be productive in less time and no refactoring time is required
These are all business decisions and they each make sense in different context.
To me you always have to ask yourself: do I hire people that familiar with X library or do I hire people that are able to do what I need regardless of the technology they want to use?
The decision depends on many factors. If you want to be faster to the market, maybe you go for library X. If you want more long term sustainability maybe you go for good developers, regardless of wether they know X or not.
Both are valid. There is never a right or wrong answer.
Useful and detailed article. I’m using this style to write a new app and having difficulty with just one part. In your model for the json string, you have a key that is a type custom object (User) a key that is a String and a key that is an array of String, but not one that is an array of an Object.
If your model looked like this:
struct Question {
let owner: [User]
}
what changes (if any) would need to be made, because currently I’m unable to get past an Unable to unwrap nil error.
Thanks!
In that case you first need to get the array from the serialization and then map its content over the User initializer:
let users: [User]
…
let userSerializations: [Serialization] = serialization.value(forKey: Keys.users)!
users = userSerializations.map(User.init)
Thanks!
I had been working on this and resolved it less than an hour ago by using the horrible code below. Yeah, it took a while, and I clearly do not know how to use the map function!
As I wrote this I knew the answer must be with map, but couldn’t work it out. Both code blocks do the same thing, but yours does it properly!
Appreciate the help, really learned a lot from this article.
(…. for indentation purposes)
var usersTemp = [User]()
if let userSerializations = serialization[Keys.users.stringValue] as? [Serialization] {
….for item in userSerializations {
……..usersTemp.append(User(serialization: item))
….}
}
users = usersTemp
Your code is not so horribile. Indeed it does the same, it’s just the procedural approach. Also keep in mind that in mine I forced unwrapped optionals for the sake of simplicity of the example.
How would do this without the array wrapper? I am having trouble creating the objects at the top level that aren’t in an array (different JSON). This must be something simple I’m missing. In your example I would be trying to create a model with these values:
has_more
quota_max
quota_remaining
as well as items
Just replace the line for the wrapper with your own structure.
let yourValue = YourStructure(serialization: jsonSerialization)
return yourValue
Wow this was really terrific! Thanks for the obvious time you put into this.
What if the headers of the response hold values that needs to be stored and be used in future. For eg: some kind of authentication token that needs to be send in every request going ahead. Does that field become part of the model that we create for JSON response OR should it be part of the app state.
Yes, those need to be stored somewhere in the state of the app. Usually you create a model controller that keeps those and mediates between the requests made by view controllers (who should not care about these details) and the actual network requests.
Thank you Matteo. So something like a StateController? If possible, could you reference me to any such example?
I’m not aware of any example at the moment. There is something to be found probably, I just never stumbled upon one.
Ok. Thank you Matteo. Also Thank you for creating such beautiful articles. Eagerly waiting for more of these.
I noticed that you stored the request on a viewcontroller property to retain it from being deallocated, do you know if there is a more elegant way of solving this problem?. I wonder what happens exactly with the escaping closure that URL Session uses on their completion handlers so that they are not deallocated.
Good question. That reference is indeed needed or ARC will deallocate the request on the next line.
Regarding the escaping closure, as long as you use a weak self and properly unwrap it, you are safe. The worst that can happen is losing a reference to the request and nothing happens.
This is a simple example, in a real app you would generally have a separate model controller that holds network requests to schedule them, prioritize them and cancel them. You do so making network requests operations, and using an operation queue to arrange them. The queue itself holds a strong reference to the requests.
Awesome article, thank you! Based on your article I want to build Network level in separate SDK In case to share it between iOS app and app extensions. I’m not sure where I should locate all the models, specially models that will shared between iOS app and app extensions?
This gets hard pretty quickly. I am usually against making a separate framework until you see you have code that is repeated in at least two separate projects. Otherwise you will be making a framework that limits the architecture of your next apps according to decisions you made in the first one. And are you sure those were the best ones in the first place?
This said, a lot of networking code can be abstracted. For example, if you create a class that handles an operation queue to prioritize network calls, there might be code there you can reuse somewhere else. How much, though, has to be seen.
Model code, on the other hand, not so much. It’s too specific to the app you are making (unless you have different apps that deal with the same exact data and/or remote API).
The right way of abstracting model types would be to look again at the functionality you see repeated across projects and abstract that into protocols (with eventual protocol extensions). But I am not so sure how much of that you can find.
Hi, I enjoyed reading your article, however, I’m trying to do it the Codable way, and I’m having a hard time understanding how to achieve this approach. I understand your serializing code, but since Swift 4 comes with Codable, I thought I’d use that instead.
The problem I’m running in to now, is that the API I’m using, is not a simple case of “items” and an array of items, or a single response. The API returns data such as:
{ “users”: [] }
or
{ “user”: {} }
This would mean, that as in your example, I’m not able to easily write a single class that takes care of my API calls easily. Or am I completely missing something here?
That’s hard to answer in a comment. I will update this article to include the new Swift 4 functionality when I get a moment.
Hey! Check out a new networking layer code with a very similar architecture. It uses codable only for JSON deserialization. You can find it here: https://github.com/dev4jam/remote . Give it a star if you find it useful.
Check out this pull request, your feedback is much appreciated https://github.com/matteom/TopQuestion/pull/2
I would love to see how you integrate the Swift 4’s Codable into this architecture! Any idea on how long it will be until you make that update on this article?
I am quite busy producing other material now, so I don’t know when I will get to this.
In the meanwhile, though, I can tell you that, if you use Swift 4 Codable, you don’t need anymore the code in the section “Model types are responsible for transforming the JSON data that comes from an API”.
The rest of the approach remains the same.
Hey! Take a look on a networking layer code with a very similar architecture. It uses codable only for JSON deserialization. You can find it here: https://github.com/dev4jam/remote . Give it a star if you find it useful.
This was a really good article for beginners. Please share your article where you write the XML soap web services code with above network layer structure.
any chance this can be updated to reflect the new codable stuff, love it, but I’m in a hole trying to figure out how to apply it to that sort of model.
Hey! I’ve shared a networking layer code with a very similar architecture. It uses codable only for JSON deserialization. You can find it here: https://github.com/dev4jam/remote . Give it a star if you find it useful.
waiting for the Swift 4 update with Codable, I’m trying to make that work with your approach, but still running into issues.
Can you give me an example?
Hey Matteo. Well, at that moment (20h ago) it wasn’t like a specific issue, but more like I wanted to see your approach with your comments and explanations :)
In the meantime, I found this guy’s article that pointed me in a better direction then modifying your Serialization approach: https://medium.com/@jamesrochabrun/protocol-based-generic-networking-using-jsondecoder-and-decodable-in-swift-4-fc9e889e8081
Uses a Generics and Codable approach, which I modified a bit to my taste and come up with a very nice and lightweight network infrastructure. I’ll need to extend it a bit more in other apps (the current app I am working on only has some GET, no POST), but it should be a piece of cake now.
Anyway, great post, great explanations, I’m enjoying your free course now, although it covers almost everything that I’m already doing :)
I hate to admit, but my network layer so far was a singleton that was calling Alamofire with enclosures and that was about it, models could be init from NSDictionaries. Not a bad approach, easy to debug or to add new methods, but pales in comparison to the beauty of the current implementation.
Check out this pull request https://github.com/matteom/TopQuestion/pull/2, your feedback is much appreciated
Thanks for the update.
I will integrate the changes when I will update the article. I want to keep the repo and the explanation aligned.
Loved the Article. You’re a great Teacher!!! Keep it up.
Hi Matteo, Thanks for the amazing article! Is there an update for Swift 4 with the new serialisation API?
Hi Matteo,
First of all, great article explaining things crisply! I really enjoy your writing and designing style.
I am working on writing a network layer to use in my apps. I have used most of your code, but adapted it for Swift 4 with Codable, removing your logic for serialising.
However, I made little 2 changes from your approach to handle my use-cases:
1. To allow app to make POST/PUT requests, I added few properties to ApiResource (methodType, requestBodyDict as an optional dictionary. I, also made ApiResource class to create and pass URLRequest instead of URL to ‘load’ method of NetworkRequest. This way, I am able to configure and create request for all method types (GET, POST, PUT, DELETE)
2. I also made ApiResource class’s makeModel method to return Model? instead of [Model]? to make this method generic for all kinds of JSON response (Array, Dictionary, etc.). Instead, I defined if it’s an array or simple Model through associated type of in concrete implementation classes of ApiResource protocol.
Would love to know your thoughts about these two design decisions and if they are in sync with approach you decided on for this architecture.
Thanks,
Vaibhav
Hey Vaibhav,
this is a quite advanced topic, so I am afraid I cannot give you an in depth explanation in a comment.
I’ll try to give you a brief idea.
Your approach can work, but it depends a lot on the API you are targeting. The problem is that there are many dimensions to consider for each network call.
Different actions often require:
– different HTTP methods (GET, POST, PUT, PATCH, DELETE)
– different URL query string parameters
– different HTTP headers
– different types of data in the body (URL encoded parameters, JSON, raw data)
– different data in the response (JSON, raw data, etc)
– different HTTP status codes (200, 204, 404)
The problem of all this is that you find yourself writing long if-else or switch statement for all the combinations, which becomes a mess quickly.
This is becasue it violates the Open/Closed pricinciple of SOLID, which I recommend checking
The solution is to use less parameters, which require many conditional statements and more separate types for each kind of request.
I can’t show you an example, that takes at least an full article to explain the whole idea, and it takes me many lessons to cover all the nuances in my advanced couese.
I hope this helps.
Thanks Matteo for replying. :)
I think I understand what you are hinting at. I’ll try few things and see what works best for my case.
Meanwhile, I have also subscribed to your free course and completed the 1 chapter. I hope by the end of course, I’d have a better understanding of how to achieve cleaner architecture.
Thanks again.
Matteo,
Absolutely brilliant post, this has helped me tremendously, as I’m pretty new to this. This does a great job of isolating and modularizing the code. I have an additional need though and I’m struggling with the right way to implement it, perhaps you know of a straightforward approach.
I would like to leverage this code to pull a number of different data structures from different REST calls. Each data structure has a different wrapper in the JSON. For your example, all of the data is wrapped with the key “items”, so you use that in the makeModel function in the ApiResource extension as follows:
return wrapper.items.map(makeModel(serialization:))
I need to pull in data structures with different wrappers (such as: vehicles, drivers, trips). Not only do I not know how to detect which wrapper is in use in this function, but the ApiResource extension should be generic anyway so shouldn’t the wrapper be passed in from each instance of the ApiResource? I can’t figure out how to make that work.
First of all, look into the `Encodable` and `Decodable` protocols. The concepts are the same, but they avoid all the code related to conversion from JSON.
This said, I am not sure I understand the reply you get from the server.
The Stack Exchange API returns data into wrappers, but it sounds to me that what you get are different JSON objects. That’s actually more common, other APIs I used don’t use a wrapper around elements.
In that case, you simply create a struct for every type (Vehicle, Driver, Trip), make each conform to Decodable and then convert the JSON data uing a JSONDecoder, passing the correct struct type to the decode method.
I hope I got your question correctly.
Hi Matteo, I really appreciate your solution, but I am new to Unit Tests and I find it difficult to test it. I used your solution but migrating the decode to use Decodable from Swift 4. Can we discuss how it would be to test this approach? Do you think I should test just the class implementations or also test methods into protocols? How would you do this? Thanks :)
I will soon update this artcile to use Decodable.
Regarding unit testing, it does not make a difference in the approach. What Decodable does is still place the decoding code in model types, as I cover in this article. So you would end with the same objects which you would test in the same way.
Really loved this. How would you cancel your data task? Let’s say you have a tableview which loads images, and the user scrolls fast – it would be good to cancel the data task since cells are reused.
That’s a bit complex.
Let’s start from the fact that I don’t cancel those requests. It’s a waste of bandwidth and battry to fire a series of network requests and then cancel them.
The user is likely to scroll up again, so it’s better to complete them and have the images ready, instead of requesting them again. Moreover, these transfers are short, so they are likely to be finished before you get to cancel them.
The real problem here is different. As you mentioned, cells are reused, so you have to prevent images ending in the wrong cells because of competing concurrent network requests.
Many developers put such code inside cells, but that’s the wrong place. It’s a bad fix for a problem that exists elsewhere.
The correct way to do it is at the level of the view controller and the data source:
1) The view controller fires all the requests for images
2) When a response comes, the view controller sets the image in the data source for the appropriate index path. This avoids conflicts. Cells are reused, but each index path has one image.
3) When the table view reuses a cell, you can configure it with the correct image for that index path. Network requests don’t compete anymore.
4) To update a cell on screen when an image request finishes, use the reloadRows(at:with:) method, with the proper index path.
Finally, if you want to cancel a bunch of requests when the view controller goes away, the answer is in URLSession. Many developers use the shared session for all requests, but that’s not correct. URLSession has been designed to have separate sessions to group requests.
So, the correct solution is to have one session per view controller. You can then use the invalidateAndCancel() method to cancel all data tasks at once. Architecturally, this is to complicated for a blog comment, but you get the idea.
an awesome article
I’m hoping to use code pretty heavily derived from this in an open source Linux server application – is this permissible? If so, can you clarify the license on the GitHub repository?
Please, go on. I wrote this for didactical purposes, so the idea is that others use it as much as possible.
I never thought the sample code on GitHub needed a licence, but I can add one to simplify things. The MIT license should be the most permissive one, I think. I’ll look into it.
Thanks! I thought this was probably the case but couldn’t find anything that stated it :)
struct A {}

struct B {}

struct C {}
let objects: [Any] = [A(), B(), C()]
objects.forEach { (obj) in
switch obj.self {
case is A.Type: print("A")
case is B.Type: print("B")
case is C.Type: print("C")
default: print("Didnt handle (obj.self)")
}
}
why the control always falls on the default case? No matter the objects are value
OR reference types.
I really like the way you explain as a developer who is new in iOS development your article was very handy . Your article is a great help . Thanks!!
Took me awhile to fully comprehend your design. But kept at it and finally the light bulb went on. This is a great approach and I really appreciate the example.
This is great! I had to make a few minor changes for Swift 5, but very clean approach and easy to reuse for new API calls. Would it be possible to create an array of resources, loop through them, and call each request with the provided resource since my logic to cache the data objects is exactly the same when adding objects to a Realm database? Currently I have written each API call distinctively which works, just trying to further limit repeated code by looping through the necessary API calls instead of calling multiple functions.
When I’ll have a moment I’ll update the code for the latest Swift/iOS features.
Regarding your question, in principle you can, but that introduces more complications.
First of all, the thinking is correct. Creating collections of resources (either in-memory arrays/dictionaries or configuration files) is a way to follow the Open-Closed principle.
What you have to pay attention to is having multiple network requests going out at the same time and how they interact. First of all, they are going to clog the network, so you might want to limit their numbers. And, secondly, the order in which they happen might or might not have side effect.
There we go in the realm of concurrency, which requires another full article. In short, you would handle that by using operation queues. But before you get into such intricate code, I would make sure it is really necessary and not just premature optimization.
Thanks for this article! With this approach, how would I go about passing in a question_id to the methodPath? I’d like to be able to pass an id to get a specific question from the API.
This depends a lot on the overall structure of all your network requests. One simple approach is to add an ID property as a requirement to the ApiResource protocol. The type of such property can be optional, for those requests that don’t require any ID.
Then make the QuestionsResource conform to the protocol and update the url computer property in the ApiResource protocol extension to add it to the URL.
But again, that depends on the structure of your requests. What goes in protocols and extensions depends on what functionality all your requests have in common.
Good Article.
Really great article. I’m happy to find someone that prefers to avoid dependencies as much as I do. I just wanted to point out a small typo: “Admittedly, I did this too in the past, but now I knew better.” – I believe it shoul be “now I know better”
Fixed, thanks.
thanks for this great article.
private var request: APIRequest?
What does the property do , you are just assigning api request to that request.
if i remove that , data parsing failed. why?
That’s needed to keep the request object in memory until the network request ends. Otherwise, there are no references left and ARC removes it from memory.